Showing posts with label Patterns. Show all posts

Saturday, August 01, 2026

Geansai Gaelach - An Irish Jumper. My First Ever Garment Knitting Pattern is Live. 19 sizes.

The GeansaĆ­ Gaelach pattern is inspired by an exquisite Aran gansey, or geansaĆ­, held at the National Museum of Ireland (obtained 1942). Showcased in the ‘Is Fashion Modern?’ exhibition at New York’s Museum of Modern Art (2017) and in the ‘Changing Ireland’ gallery in Dublin’s Collins Barracks (2025), it was and has remained an iconic representative of the Aran style.


The fishermen and the Herring Girls took their knitting wherever they worked. In this way the gansey style spread and developed all around the British Isles and Ireland from around the 19th Century. The all-over combination of central panels, bobbles and cables that we now recognise as the Aran style, developed as recently as the early 1900’s in Ireland and has a well-documented history. Borne of the old ganseys, the Aran style became and remains colloquially Irish.


“The jerseys that the women knit are white or indigo... and on these square shaped garments they improvise, as a musician will improvise on some simple melody, their own individual fancies. There are circles and ellipses and zigzag lines and dots like a chain of pearls, and loops and lovers’ knots and lines like rippled water”.


This design is compiled by adapting just a few of the original motifs. It is an homage to the Ireland of my ancestors and to the knitting traditions I am so fortunate to have inherited through my mothers and grandmothers.


Geansai Gaelach is made using 5 ply (sports weight) Propagansey Corriedale wool. It comes in 19 sizes from (a): 47 cm to (s): 178 cm chest. Adult sizes are given in both female and male proportions.


The children’s sizes broadly equate to: 

(a): 0 to 6 months, (b): 6-18 months, (c): 1 to 2.5 years, (d): 2 to 4 years, (e): 4 to 6 years, (f): 6 to 8 years and (g): 8 to 10 years.

Sizes: (a to g): 240(280,330,440/520,640,760) metres. 

Sizes (h to s): Women’s:(930/1030,1130,1230,1360/1480,1640,1840,2070/2290,2450,2630)metres & Men’s: (1020/1150,1245,1300,1480/1640,1830,2030,2285/2520,2680,2860) metres.


Gauge: 28 sts x 36 rows = 10 cm.

Needles: 3.5 & 2.75 mm circular or double pointed needles and cables to suit (or those to obtain gauge).

Available at my Etsy store or at Ravelry. All sizes are within this pattern.


 This is the original, held at the National Museum of Ireland. Link HERE to a lovely story about Aran knitting.

Monday, May 09, 2022

A Crack At Making A Knitting Belt


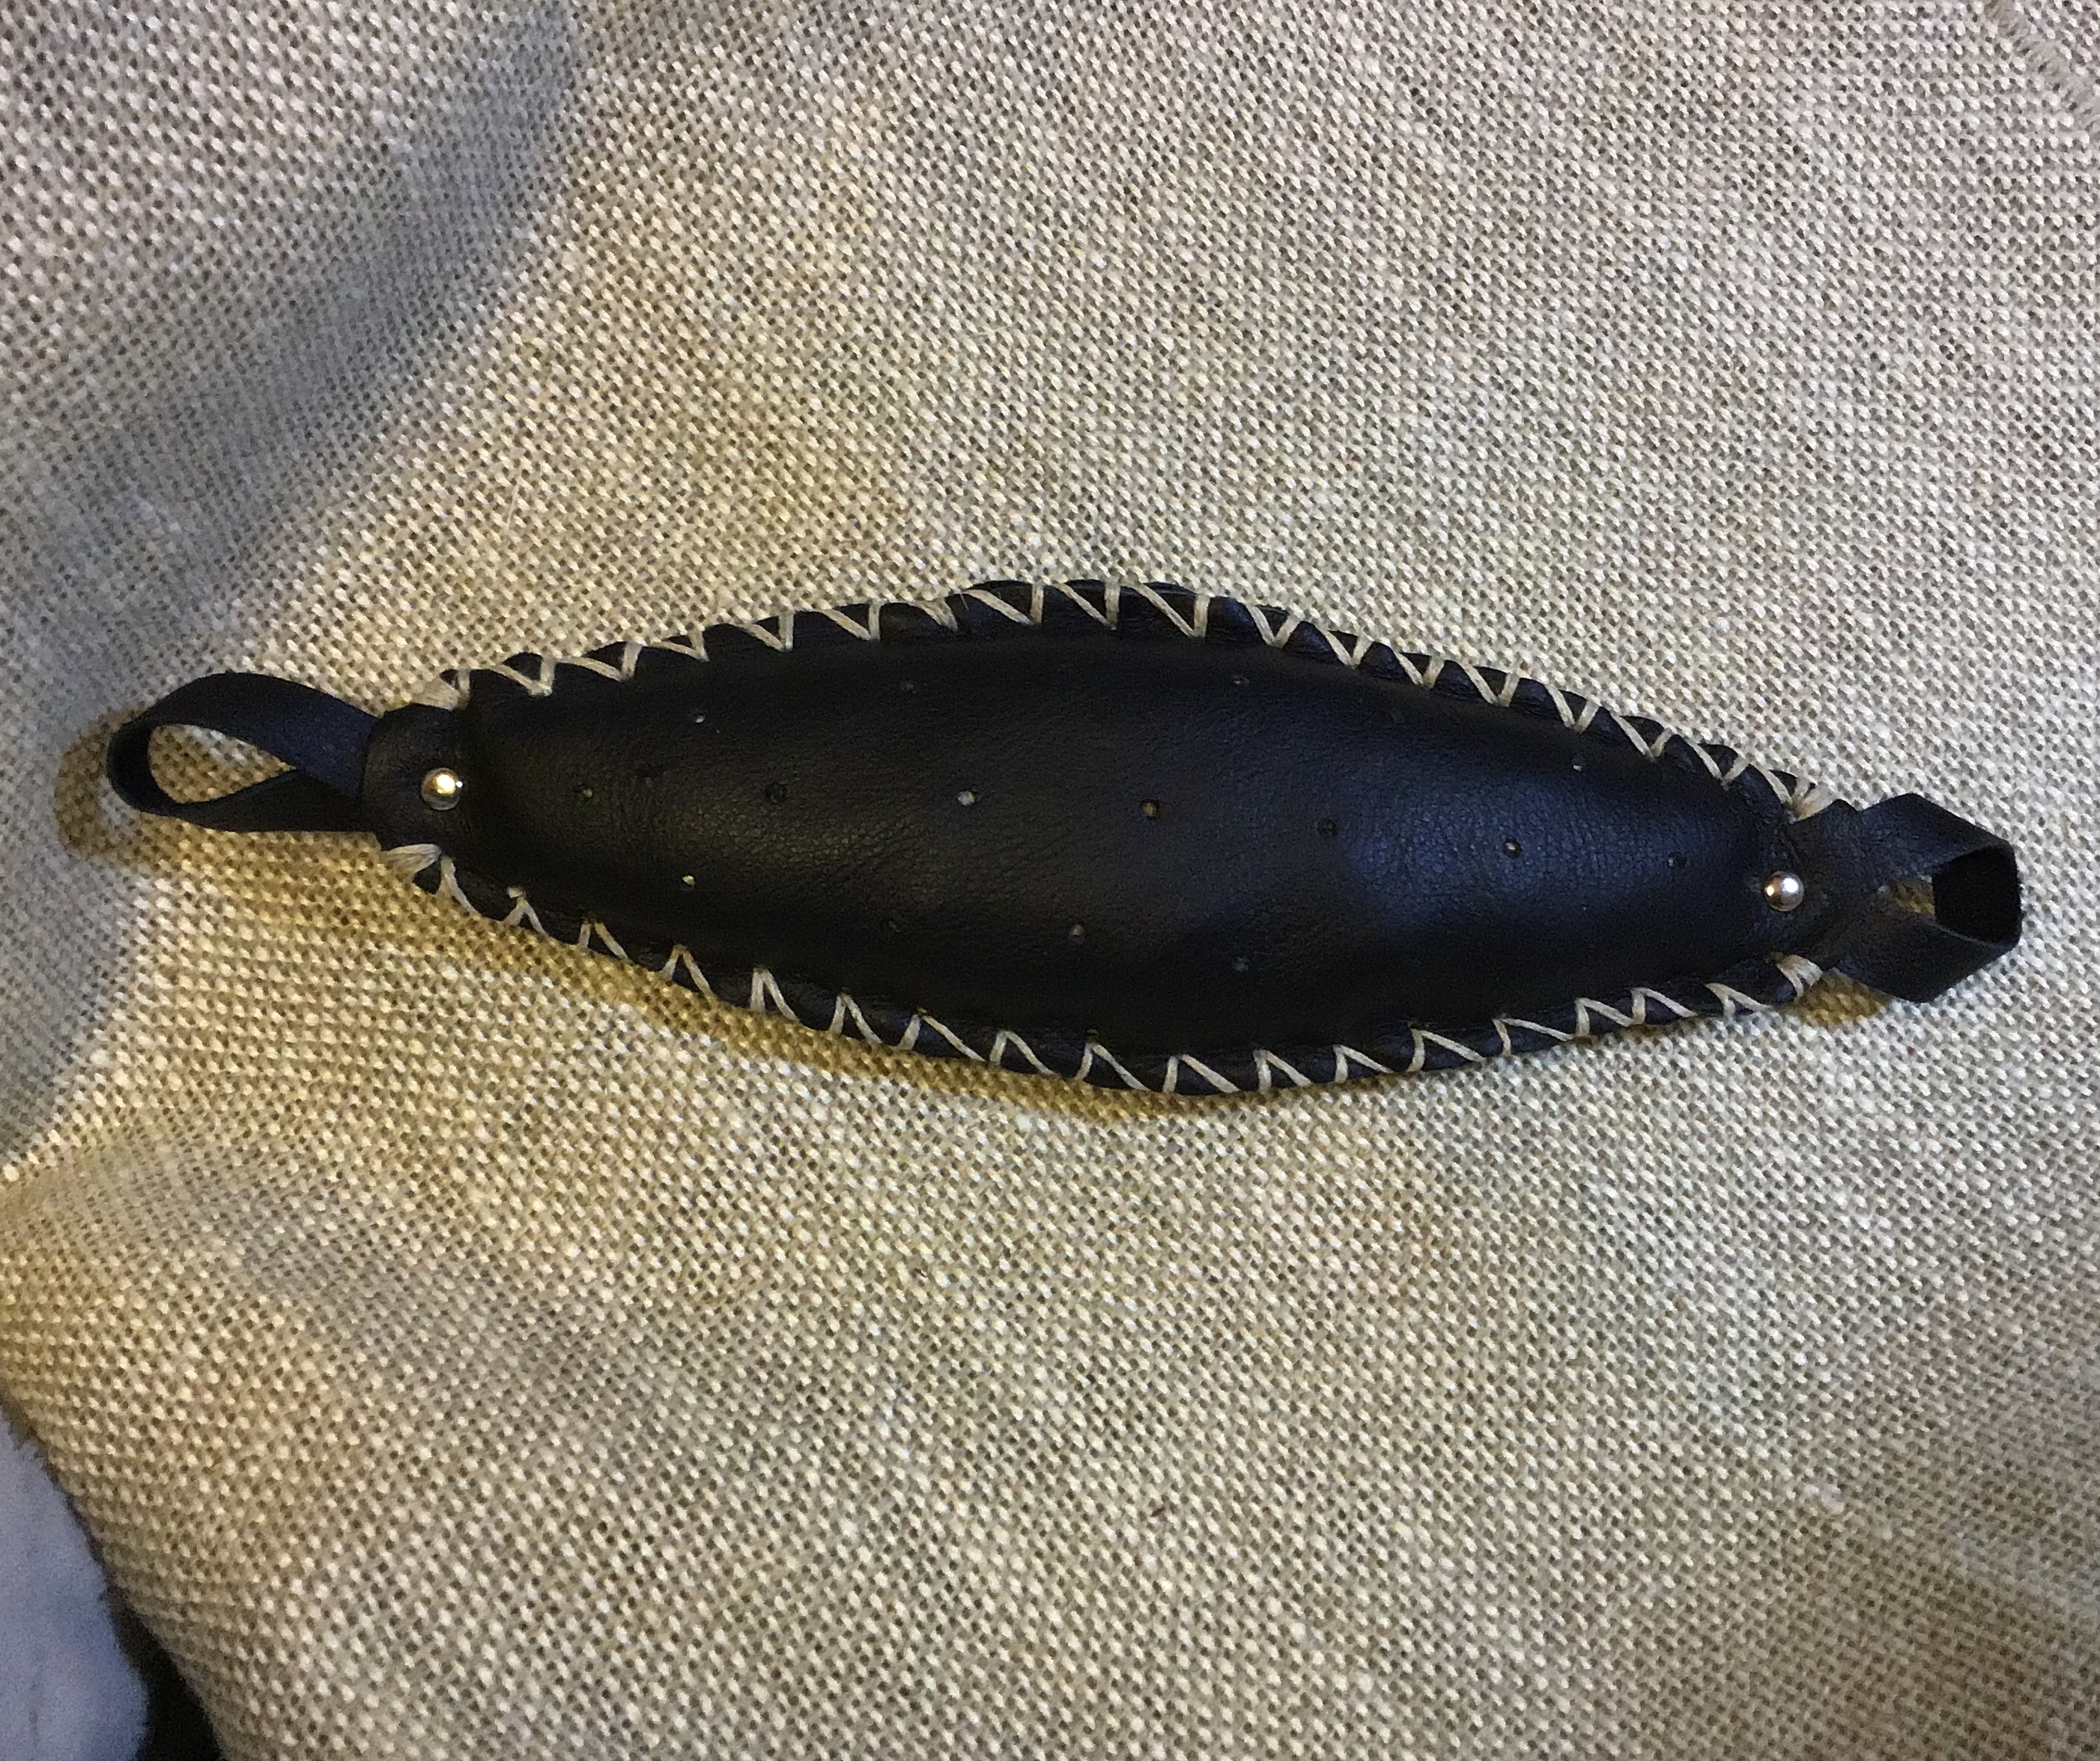
Finished Object. 20 x 9 cm plus loops. For info regarding their use, go here.


After questioning everyone for information (thanks everyone) regarding the use of knitting belts, I have had a go at making one. Much to my disappointment, I had neither horse hair nor coconut fibre at hand, to stuff it. Unusual that I don't have everything I need in my room!
(I've used other stuff now. Pictured below).
I contemplated using a heavy, raw silk fabric (cut into strips and shoved in tightly). Silk was used in ancient armour because it has the ability to slow arrows and swords and such like. I haven't tested the theory so don't try it at home, but it is a gritty, fine and dense fibre. 
Mozzie's won't bite you through the finest silk cloth.
But, I thought, the needle may need to be held somewhat, by the stuffing. So I'll wait (I didn't wait). I looked inside our vintage 1950's lounge suite (it has a massive tear in it) but they've used cotton rag stuffing so I couldn't raid that either. (I later wondered if it might work after all, but too late).

Oh, that's right! I can use sisal and will go immediately to cut a piece off some rope! (I did).

I thought I'd share the process:


I've left the stitching open here, waiting for stuffing. You can see the silver studs or rivets at the ends, through the four thicknesses of leather. Tuck the loops in the ends and bang a stud/rivet through all 4 layers. I did this first, before stitching, so I could stitch right up to the gaps.


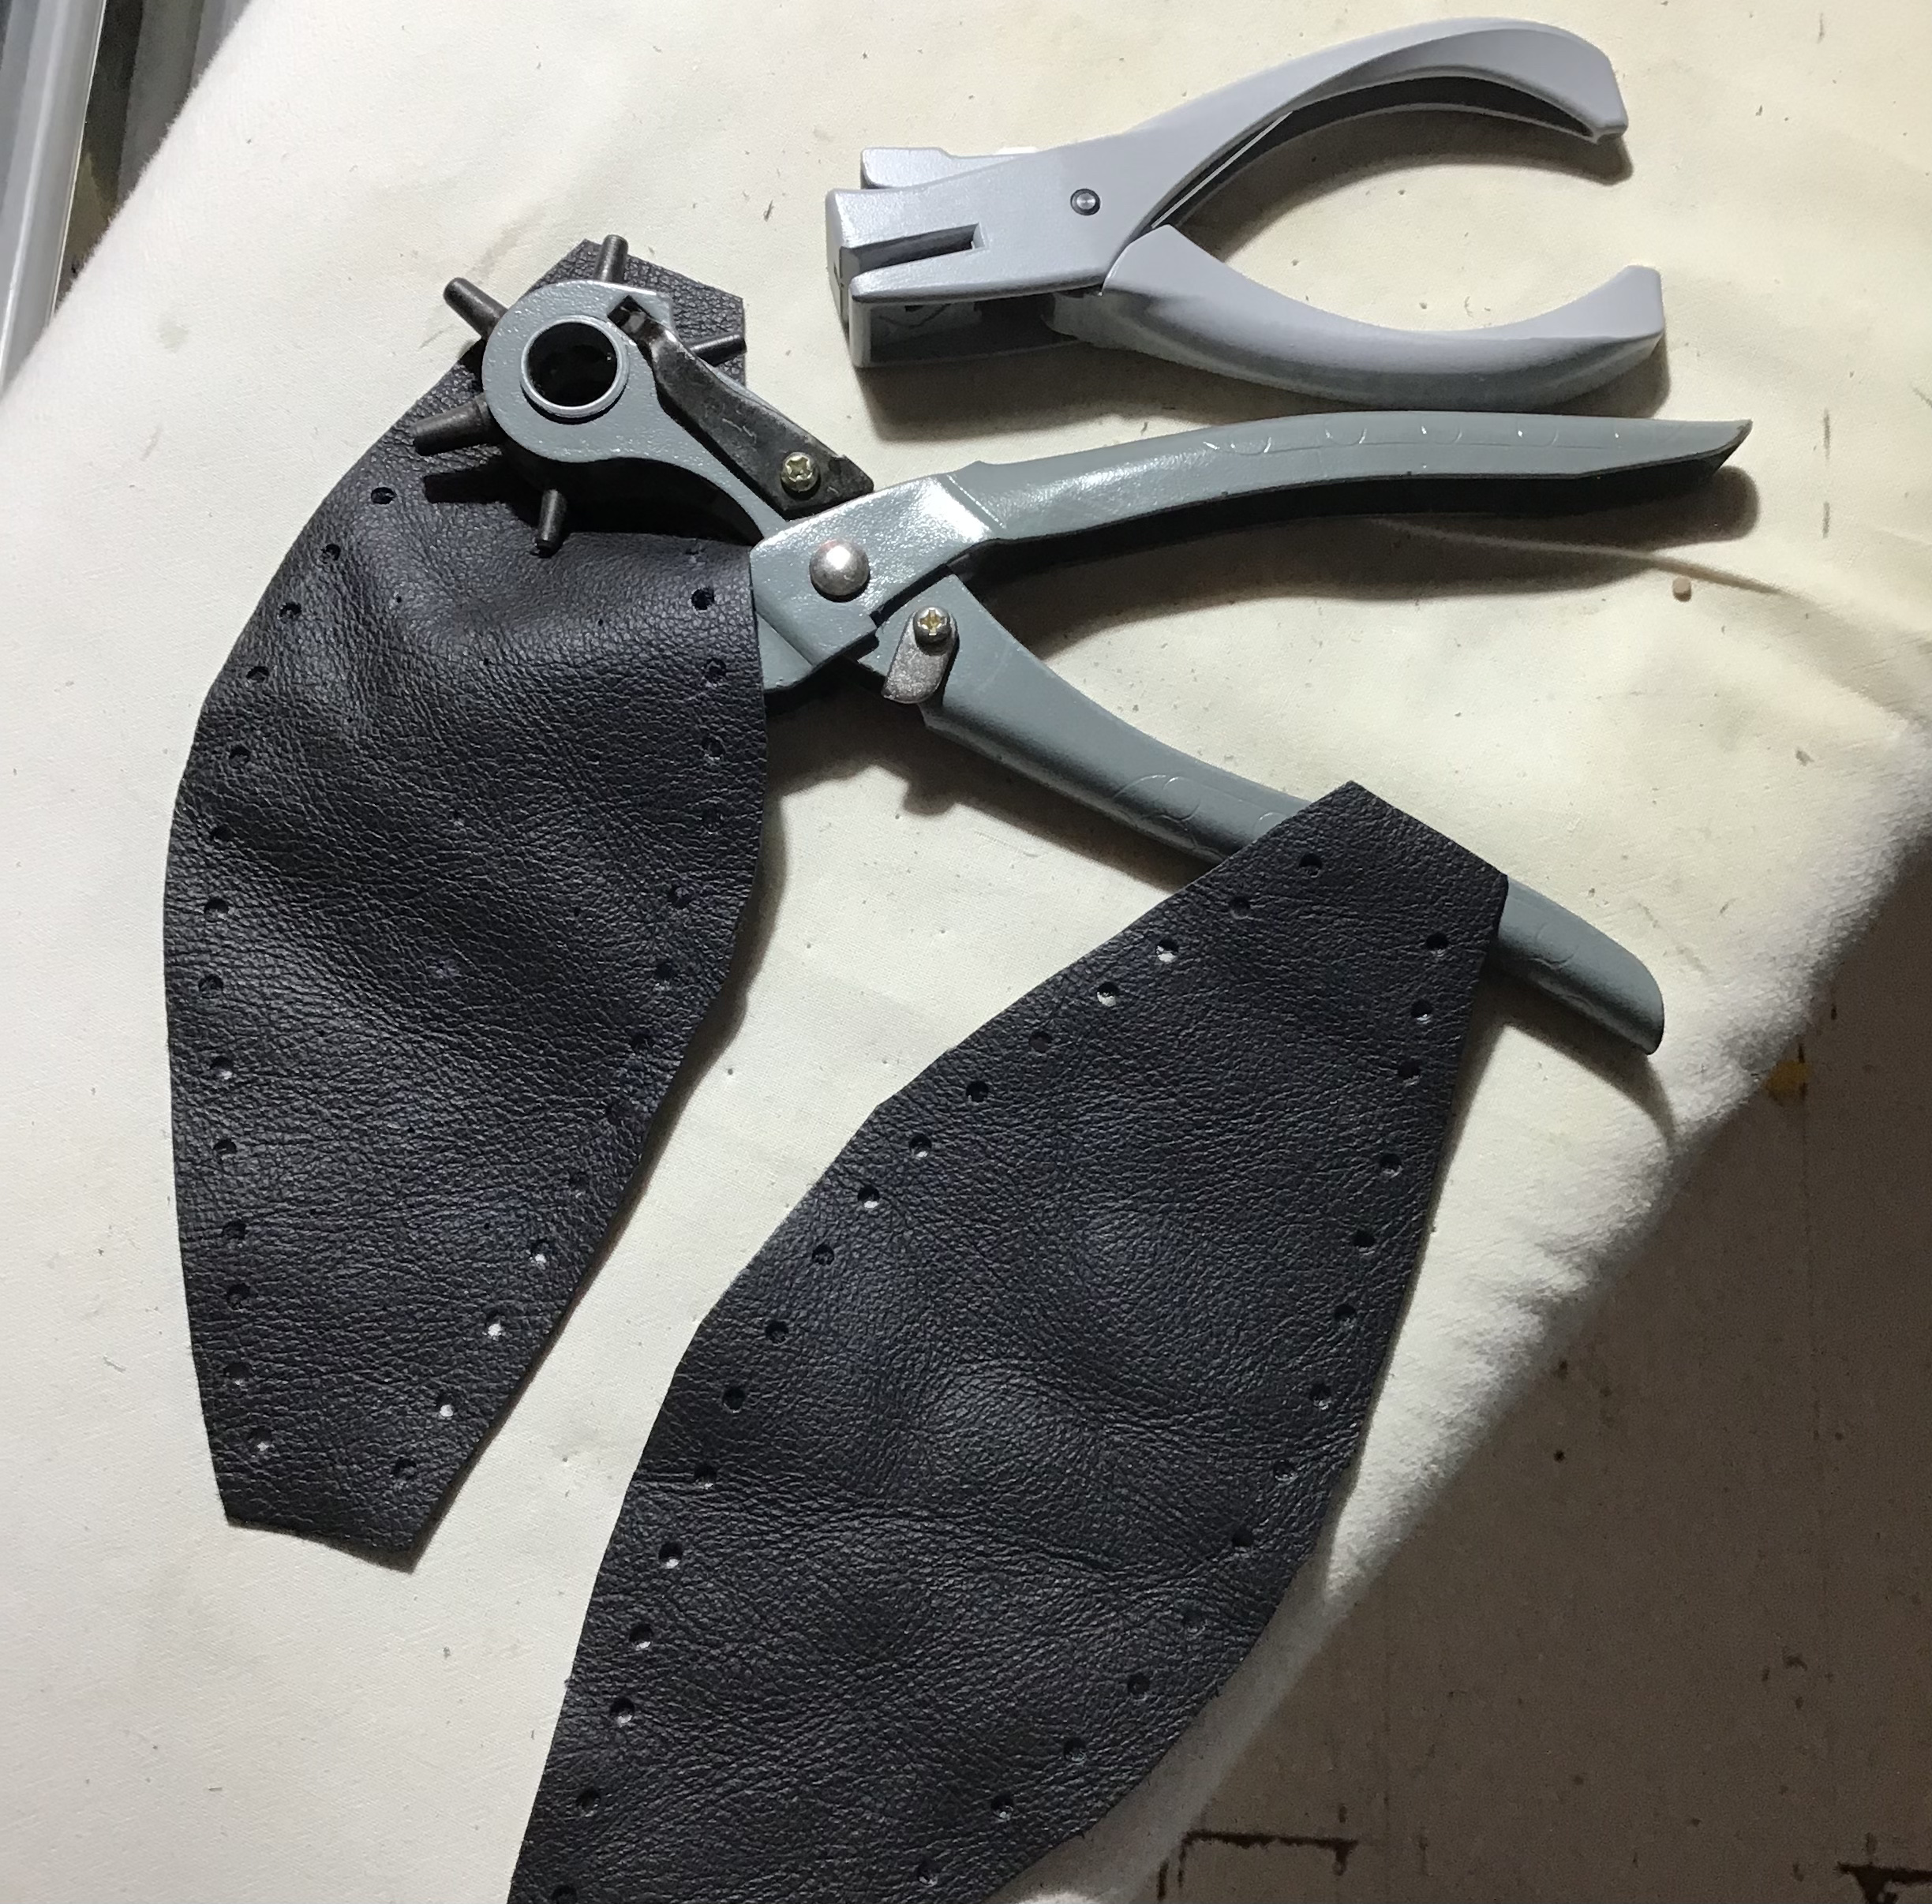
The template is 20cm long and 9cm wide. The holes are roughly 2.5cm apart down the centre, then the outside rows of holes are in between (staggered) and roughly down a line that runs between the side and centre lines. Push a chalky pencil (or poke an awl) through these points to mark the leather, then punch the holes for your needles. Mine are small holes, maybe 3mm at the most... even a little less... because the leather isn't stiff (as it probably should be) so they will stretch soon enough.


I decided to put loops at the ends. I might have had one end with a long strap and a loop at the other, but I don't have a long strap's worth of leather. I'll find something, a cord, some bale-twine. I figure if I have a loop, I can pull the long end through and tuck it anyway so whilst I have plenty of little buckles, I didn't intend to use one. (Update: I purchased a belt strap from a leather worker at the Vic Market for $11 AU, my only cost).

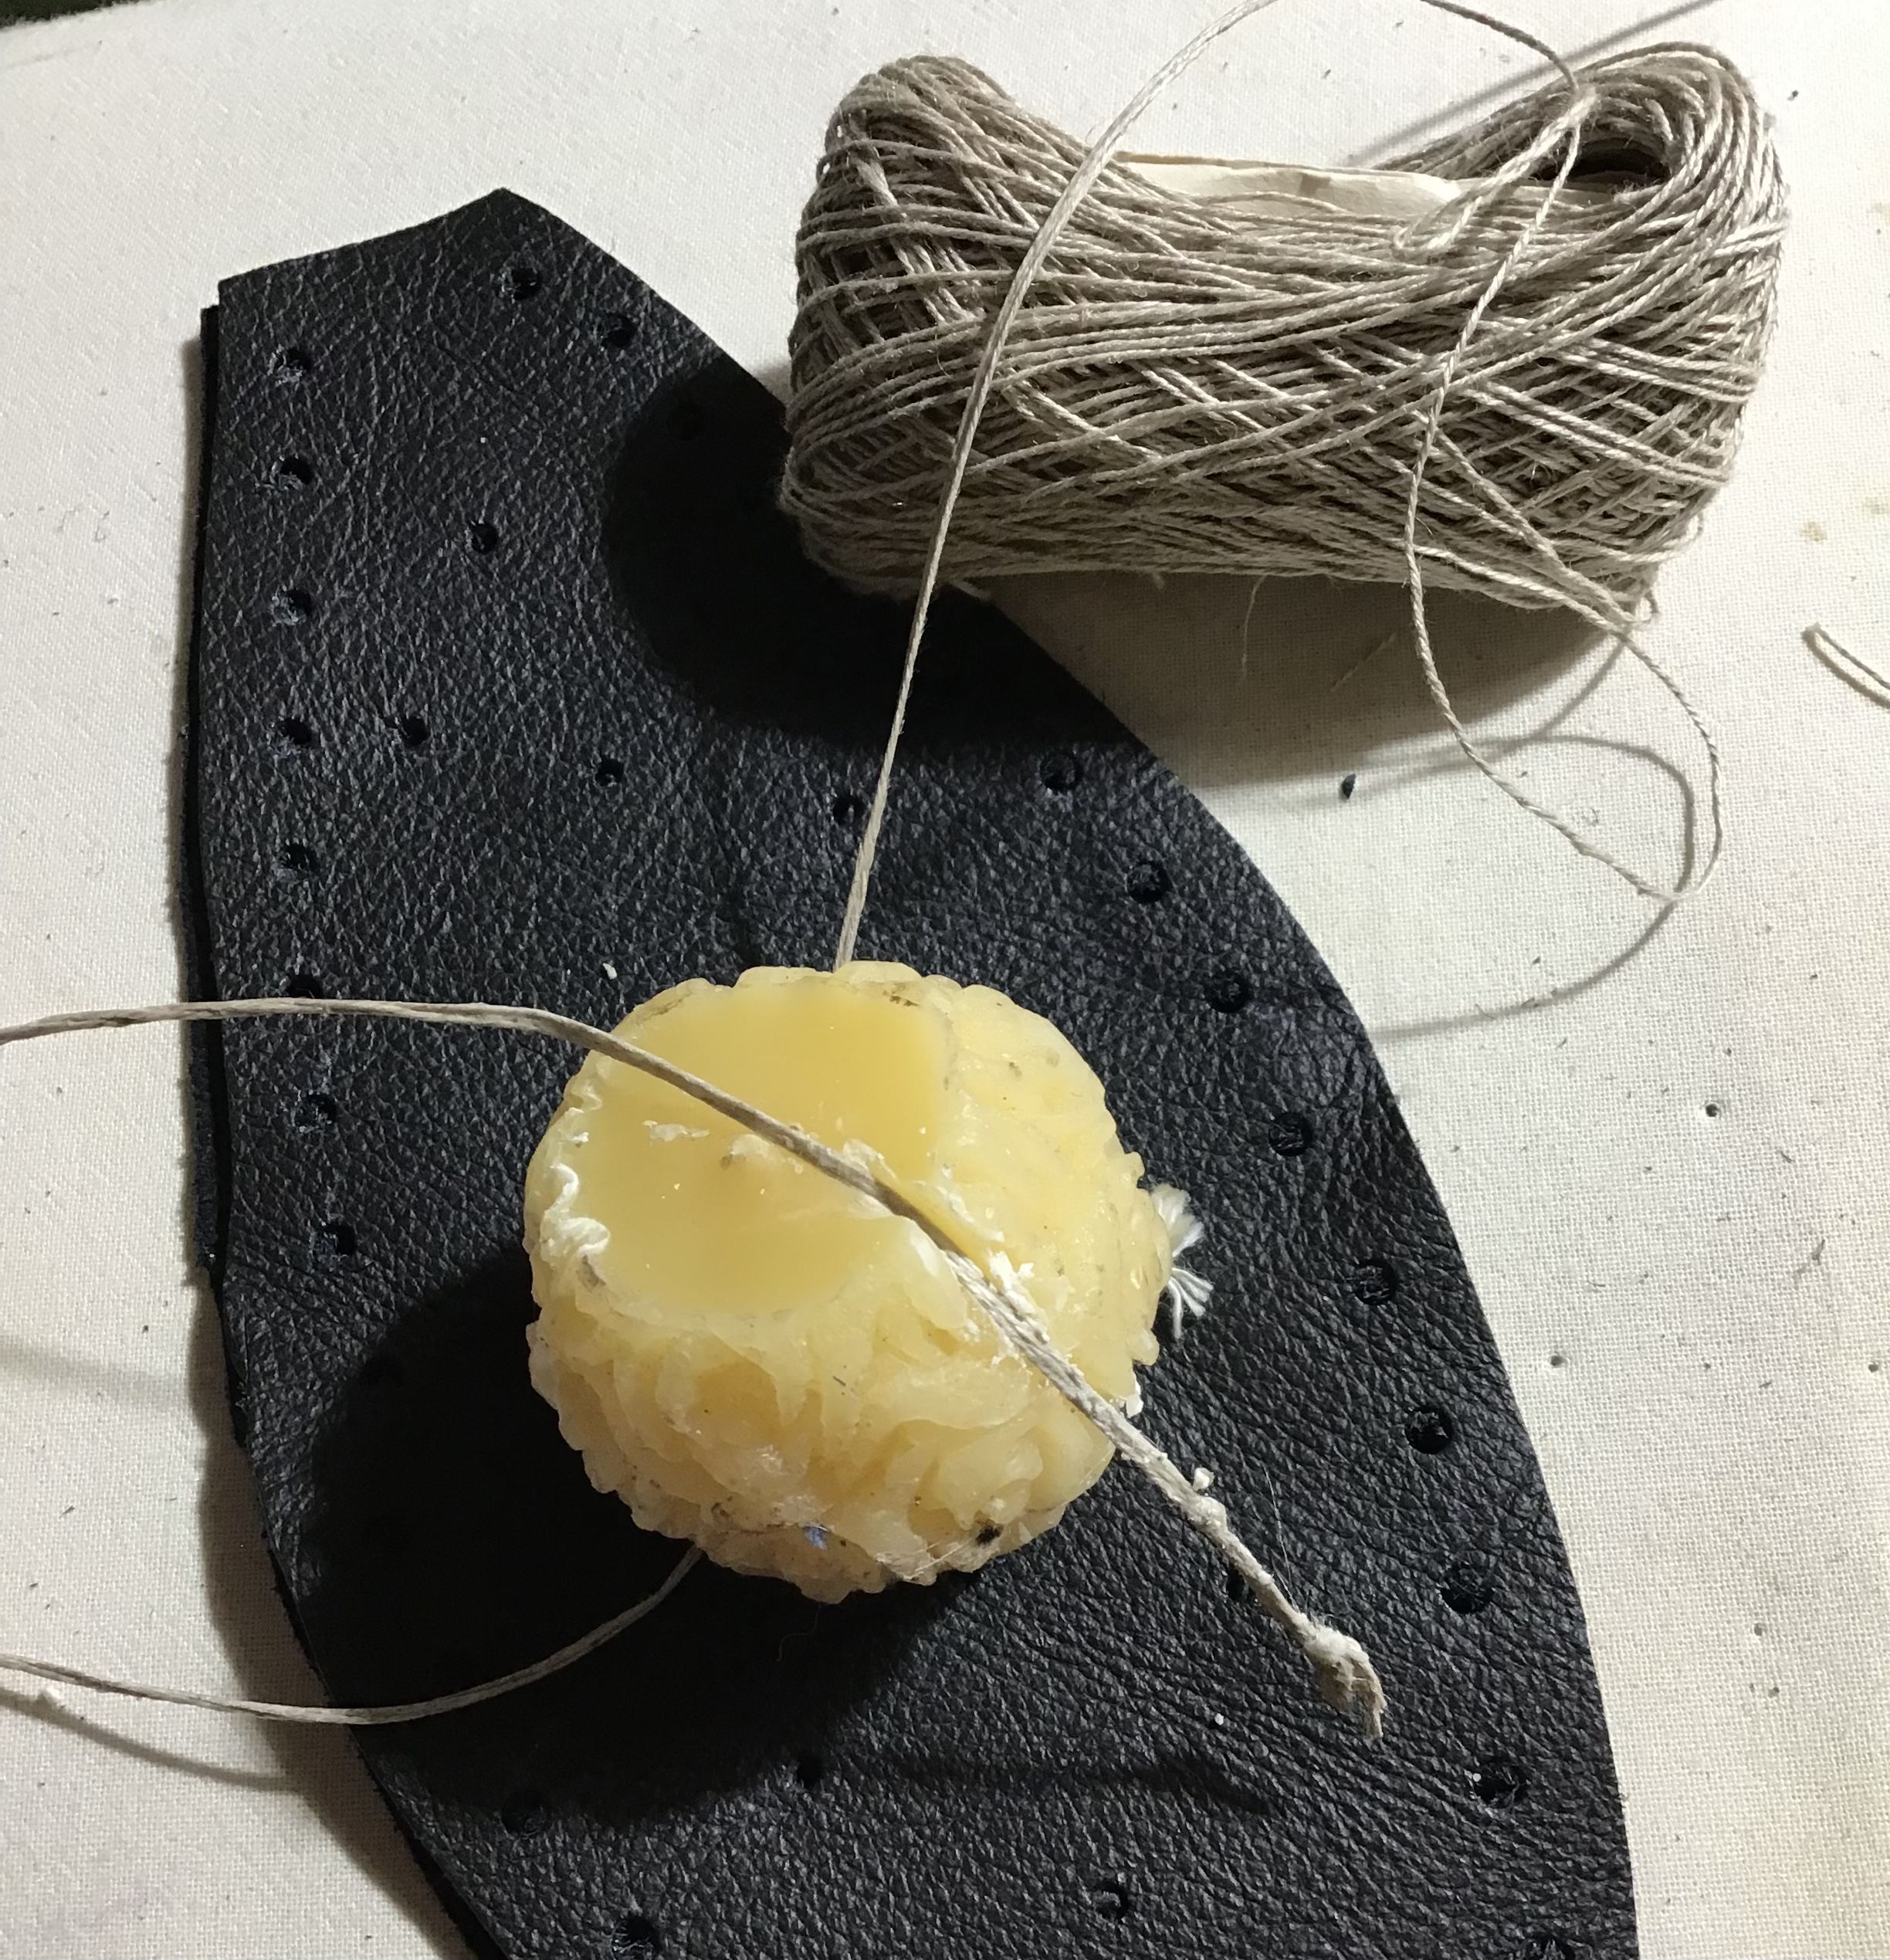
This stitch I know as Glove stitch. I pulled 3 strands of strong linen, together, through a bees wax candle. I left enough at the beginning to secure later (so I could stitch it to itself). 
Bring your needle up through the first hole, now wind around and back and up through the same hole. Next, go around again but up into the next hole. Hold it in place as you go and be firm. Repeat. 
It might have been sensible to run a bead of glue down, inside, before I stitched it... but I didn't want to have a sticky mess.


My pictures are working backwards...sorry about that... 
I punched the edge holes on the smallest setting, then marked the other piece through them, to be sure they lined up. I didn't bother measuring these edge holes, just so long as they are the same top and bottom (wrong sides facing).


My father was a fireman so I never burn candles in the house. Maybe it was our housefire when I was little that put me off? But this little beauty is very handy for things like this or to strengthen thread for quilting  (if I did quilting anymore that is, and I might yet).


Careful not to mark them one way and then try and put them together the other way, like I did. The holes didn't line up!

I've ordered long double pointed needles in a couple of brands (ok, three brands. 40cm and 35cm. It's my birthday next month so I crumble willingly over the Paypal button). 

I'm looking forward to trialling the method. I've been noticing that when I use dpn's, I 'prop' the right needle a bit already, so it seems a natural next step.


EDIT: Here we are, I found some stuff! Jute from a coffee sack, nylon tulle cut into 5x5cm bits, heavy linen (heavy rug hooking open-weave), strands of jute from a coffee sack and some ancient (possibly) mariners (or fireman's) rope from my (fireman) Dad. 
Ready to go, after I pulled the rope bits. Yay!

Next, obviously, stuff it. Poke the filling down with a blunt object. Do a little at a time and compress it firmly as you go (don't wait until it's all in before shoving it down).
Now finish off the stitching or binding and secure your ends well.

I have made a template in pdf but have to figure out how to add it.... in the meantime, here’s a pic. 

Saturday, June 05, 2021

The Evolution Of Hanky Boxes Into Yarn Bowls And Beyond

This time, after shoving my yarn baskets into dilly bags (because it’s handier to work from a bowl than a bag, but you can’t carry them about....) I thought I could combine forces and turn a bowl into a bag.
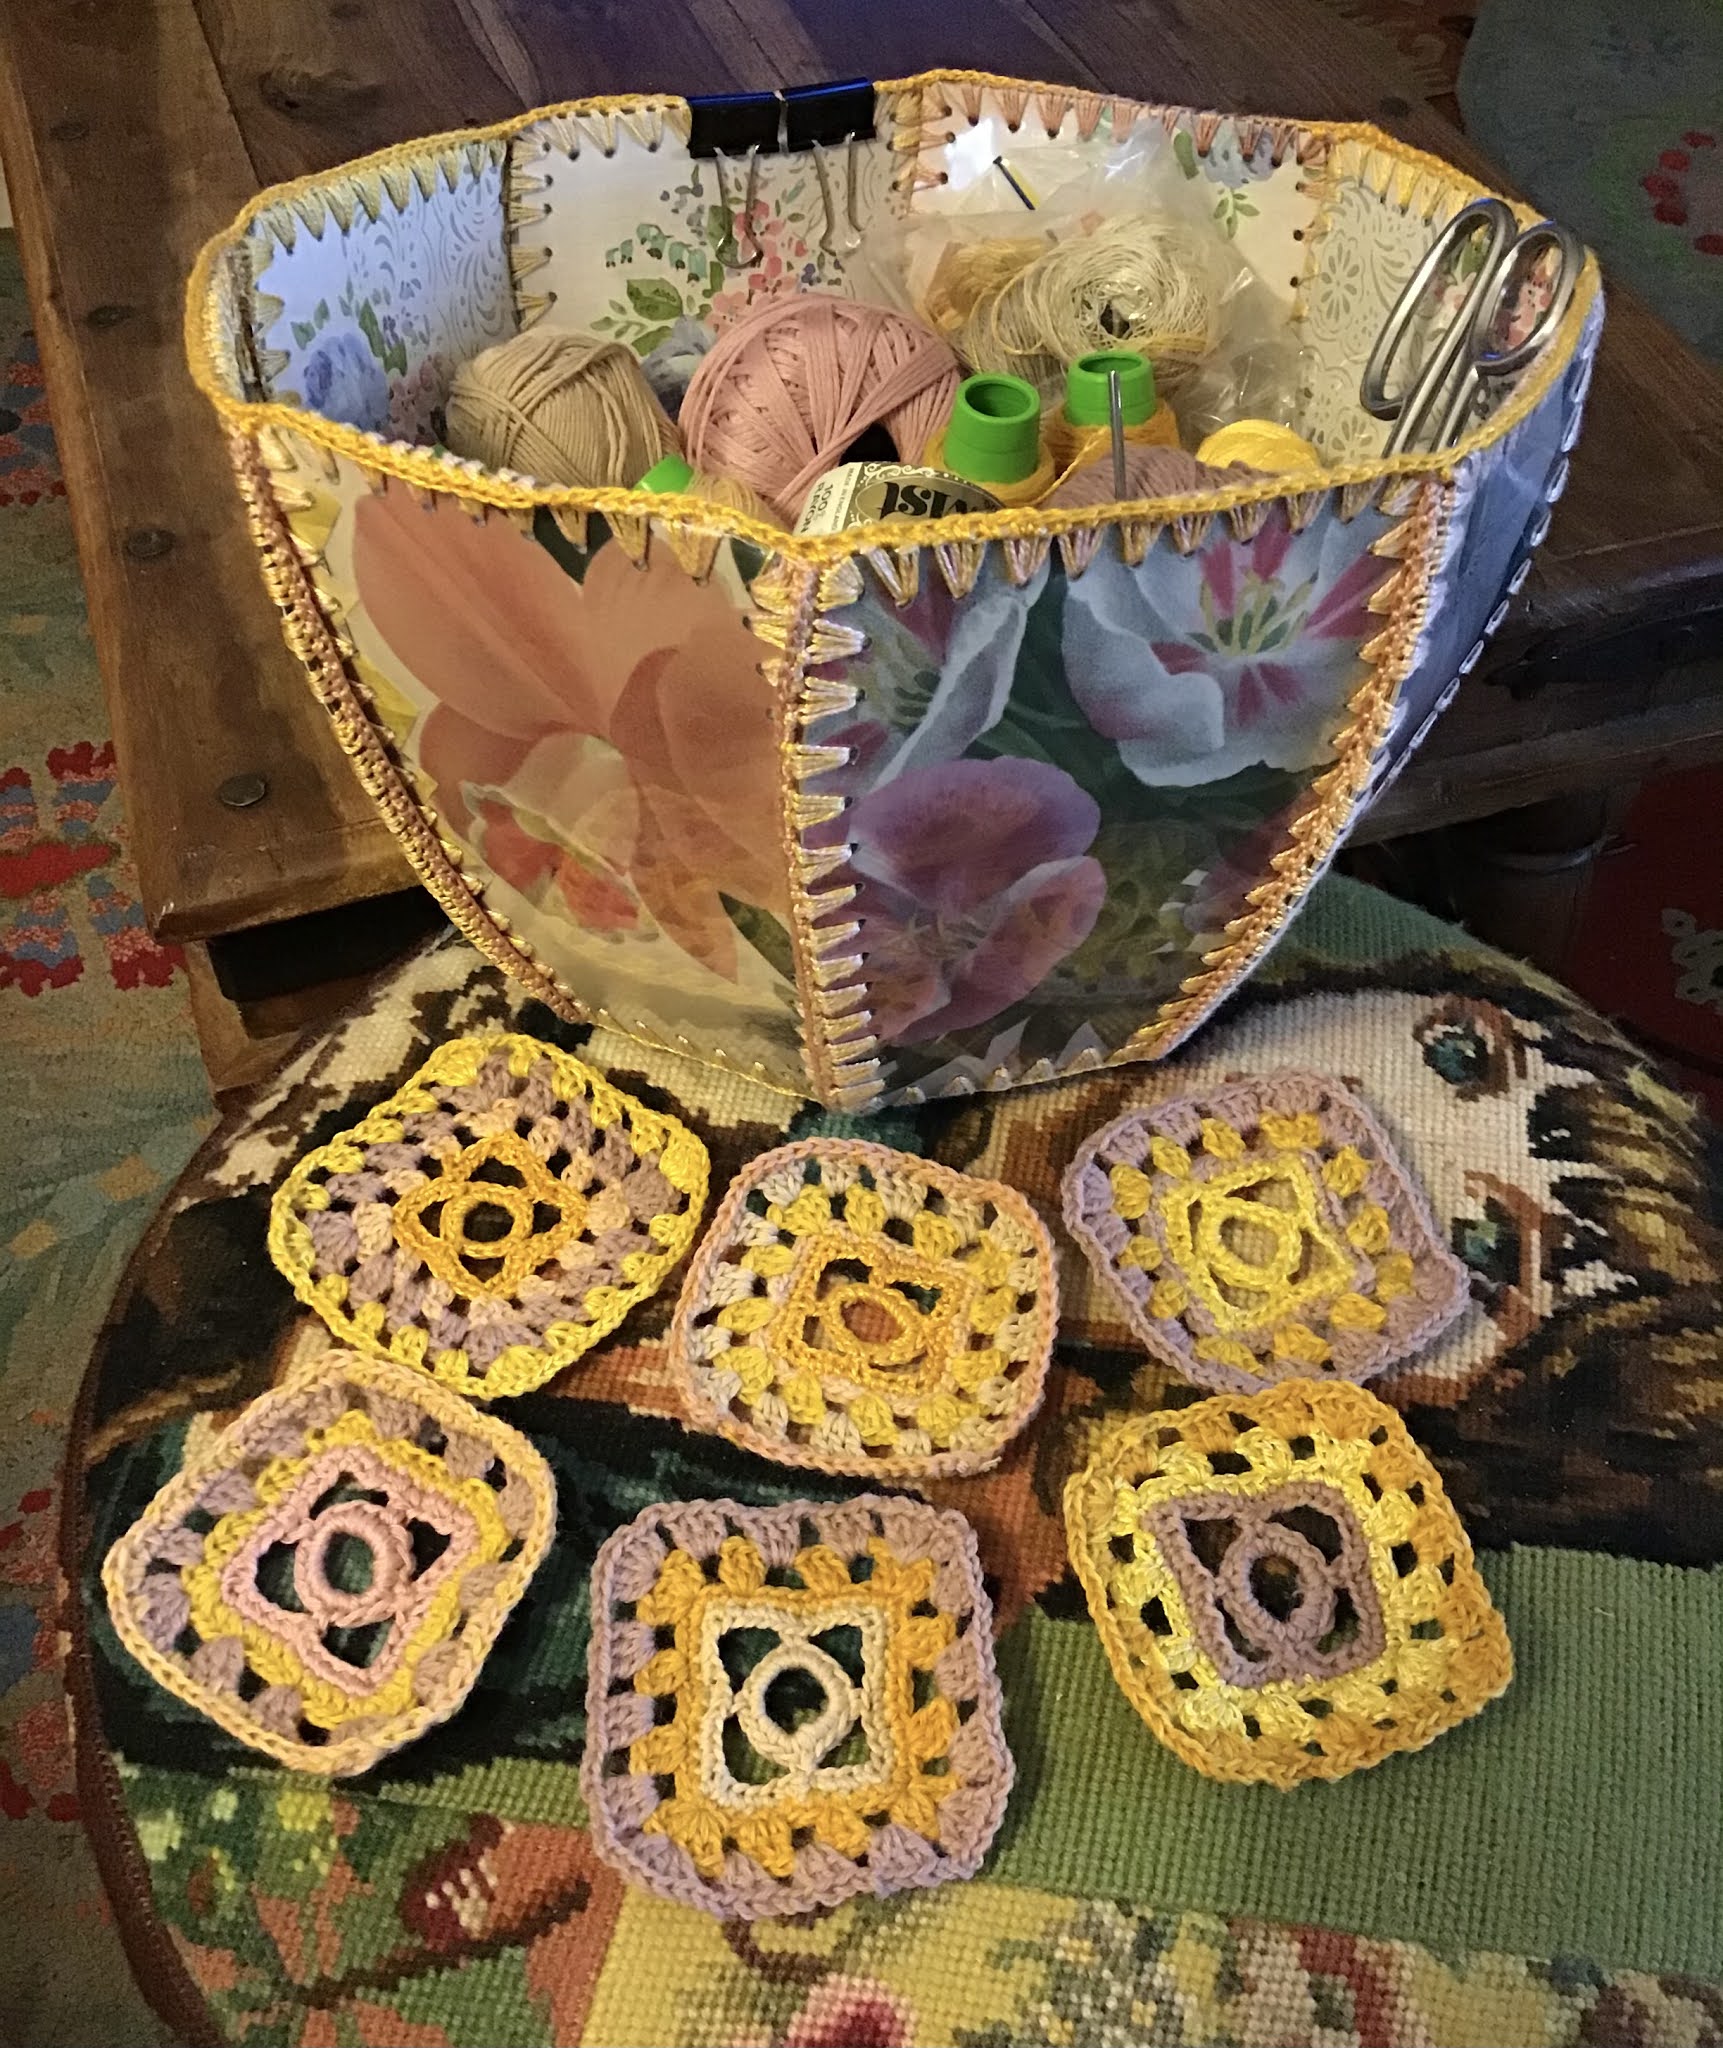
So, this bowl is fairly big, 17 cm high and 30 wide, and I’m making some granny squares to sew around the lip. Not quite sure after that. I’ll do some crocheted rows maybe before and after then a strap or two. I’m sure it will become obvious.
This was a calendar and is lined with old wallpaper. I’ve also used a heavier card to make it quite sturdy. 
All this because my knitting requires concentration to fix a mistake. Good old procrastination huh?
Everything is from my stash. Using up embroidery threads, Australian Tapestry Workshop wool, crochet cottons bought years back for face washers. Oh, plus some new Frangipani gansey wool, which is sturdy and a gorgeous dusty pink and will be great as the handles etc.


Tuesday, May 04, 2021

This Article Fron Inspirations Magazine Newsletter

SALs, Samplers and Stitching Spots
We’ve covered so many topics in All Stitched Up! over the past few weeks, it is not surprising that we’ve received a delightfully mixed bag of responses from our community. We love how different articles will inspire different people and, sorry to be repetitive but we have to say it again, we never get tired of hearing from you!
The article about stitch-alongs in All Stitched Up! issue #270 is still garnering responses, and as we believe you can never discover too many stitch-alongs or online stitching communities, please keep them coming! 

This week, we heard from Shalaya who brought our attention to the SAL from A Steady Thread. It is a floral blackwork SAL which, Shalaya reports, offers so many creative opportunities for colour variations and different sizes. 
The start of the Embroidery Motifs from Old Dutch Samplers SAL
Victoria Wakefield sent us a fantastic story about her own SAL experience. She had never heard of SALs until she discovered a Facebook page called ‘Embroidery Motifs from Old Dutch Samplers’. They were just about to start a SAL, designed by Robyne Melia that was called ‘Song of Solomon Ship Sampler’. Most of the motifs came from the book that gave the Facebook page its name, but the designer selected a range of historical patterns, themes and ideas to create a stunning project.
Embroidery Motifs from Old Dutch Samplers SAL
Participants were encouraged to use linen and threads from their stash to complete the piece, so Victoria stitched on a piece of linen shoe lining fabric she had purchased years before and used DMC threads from her own collection.
The completed sampler, stitched by Victoria
The aspect of the project she enjoyed most of all, however, was being able to speak with stitchers from all over the world and to share progress. 
She even learnt some new terms, such as ‘frogging’ or unpicking one’s work – a term which is said to come from having to ‘rip-it, rip-it’! 
But it is clear from the pictures, Victoria gained so much out of the experience. If you want to try this stunning design, Robyne Melia has it available for purchase on Etsy.

Friday, January 15, 2021

My Career As A Knitwear Designer (ha ha ha)!


I’ve decided to make more knitting designs. Work is quiet, which allows me time to map things out and think things through and calculate. So I’ve made a cardigan design and graded it into 16 sizes, from really little little to fairly big big. 

I started with a kiddies version, quite successfully too I thought, (it’s cute and I’m happy about it), then set about to do the young adult size. Yay isolation!

This one has slightly different background colours. I did the body, bottom up to the underarms and just for a break, decided to make a hat. Again I’ve varied the colours and the patterning to showcase other possibilities (and not be bored myself). But, I ran out of the main colour. It’s from Shetland and I’m in Australia so whilst I was ordering I thought I may as well choose the colours for my bigger cardigan. Which I did. 

As it turns out, Scotland has a temporary ban on international postage, so while that’s happening I went back and started the sleeves to finish the other. 

I cast on and worked the cuff, then got into the fair isle band motifs before realizing I’d left out the first band. So I pulled it back to the rib and started it properly. I got back as far as I’d gone before, some 10 cm of pattern past a deep rib but it looked too baggy. Not what I want. Unpicked it. 

Going back to my original charts I fussed over all of the adult sized sleeves... which is really, really arduous because the program I then use is sooo slow on my stupid, stupid laptop and it kills me. It took ages to generate my new improved sleeve. An evening. 

Cast on again. 

I like to cast on with 3mm needles then drop back to 2.5 mm for the ribbing but I forgot so pulled it out.  Next day... Cast on properly with 3mm but (grrr) forgot (grrrrr) to (grrrrrrr) change down...

SO I started again. Inner calm, inner calm... 62 stitches. Yes. Managed a neat, well practiced cast on with 3mm followed by a beautifully tidy (deep) cuff in 2.5mm’s. Beautiful. The size looked right for a 6. Great. Sleeves don’t take long, I’ll be done soon.

I want you to know that all of this happens between many other tasks, train trips and work and family and perusing my emails. It’s a few of days of disjointedness. I thought, right, I’d Better Just Make Sure and pulled out the pattern to be 100% and hey! The pattern said (mother-flippin’) (stop swearing) seventy (mother-flippin’) two!!!! Not. 62.

Shoving down a rising beserk, I ripped back my little neat cuff. Again. For the 5th or 4th or 10th time! Unravelled it yet again...

I pulled out the original graph. The very original paper calculations, not the stupid, arduously made print out with my fair isle plonked in. And yes, guess what? 62 was in fact CORRECT! Time to tear up the wrong print outs, with vigor.

You’ll be proud of me because I didn’t swear (out loud) and I didn’t cry (on the inside). I either overcame my feelings of rage and disappointment and boredom, or suppressed them deeply and just got up, packed a bag for the train trip in the morning and went to bed.

Before I did go to bed I thought I’d get out a fresh ball of wool for the cuffs, since I’d worn the other ragged and it might be better to bury it deep inside the fair isle. So I grabbed another and saw that I was going to run out before I finished the cardigan and needed to order another couple. But Scotland... mail...

Never mind... suck it up (you stupid, stupid idiot)...

This morning I had a nice walk before I caught the train to the city. I listened to a great podcast about early female pilots in Australia, whilst walking through the pretty bush. Lovely! On the train I set up a show I’m watching on my propped iPad, cast on 62 stitches neatly with 3mm needles then dug in my bag to change to 2.5’s and guess what? I’d left them at home.


Monday, January 11, 2021

Two Would Have Done It But Bad Luck, I Made Three

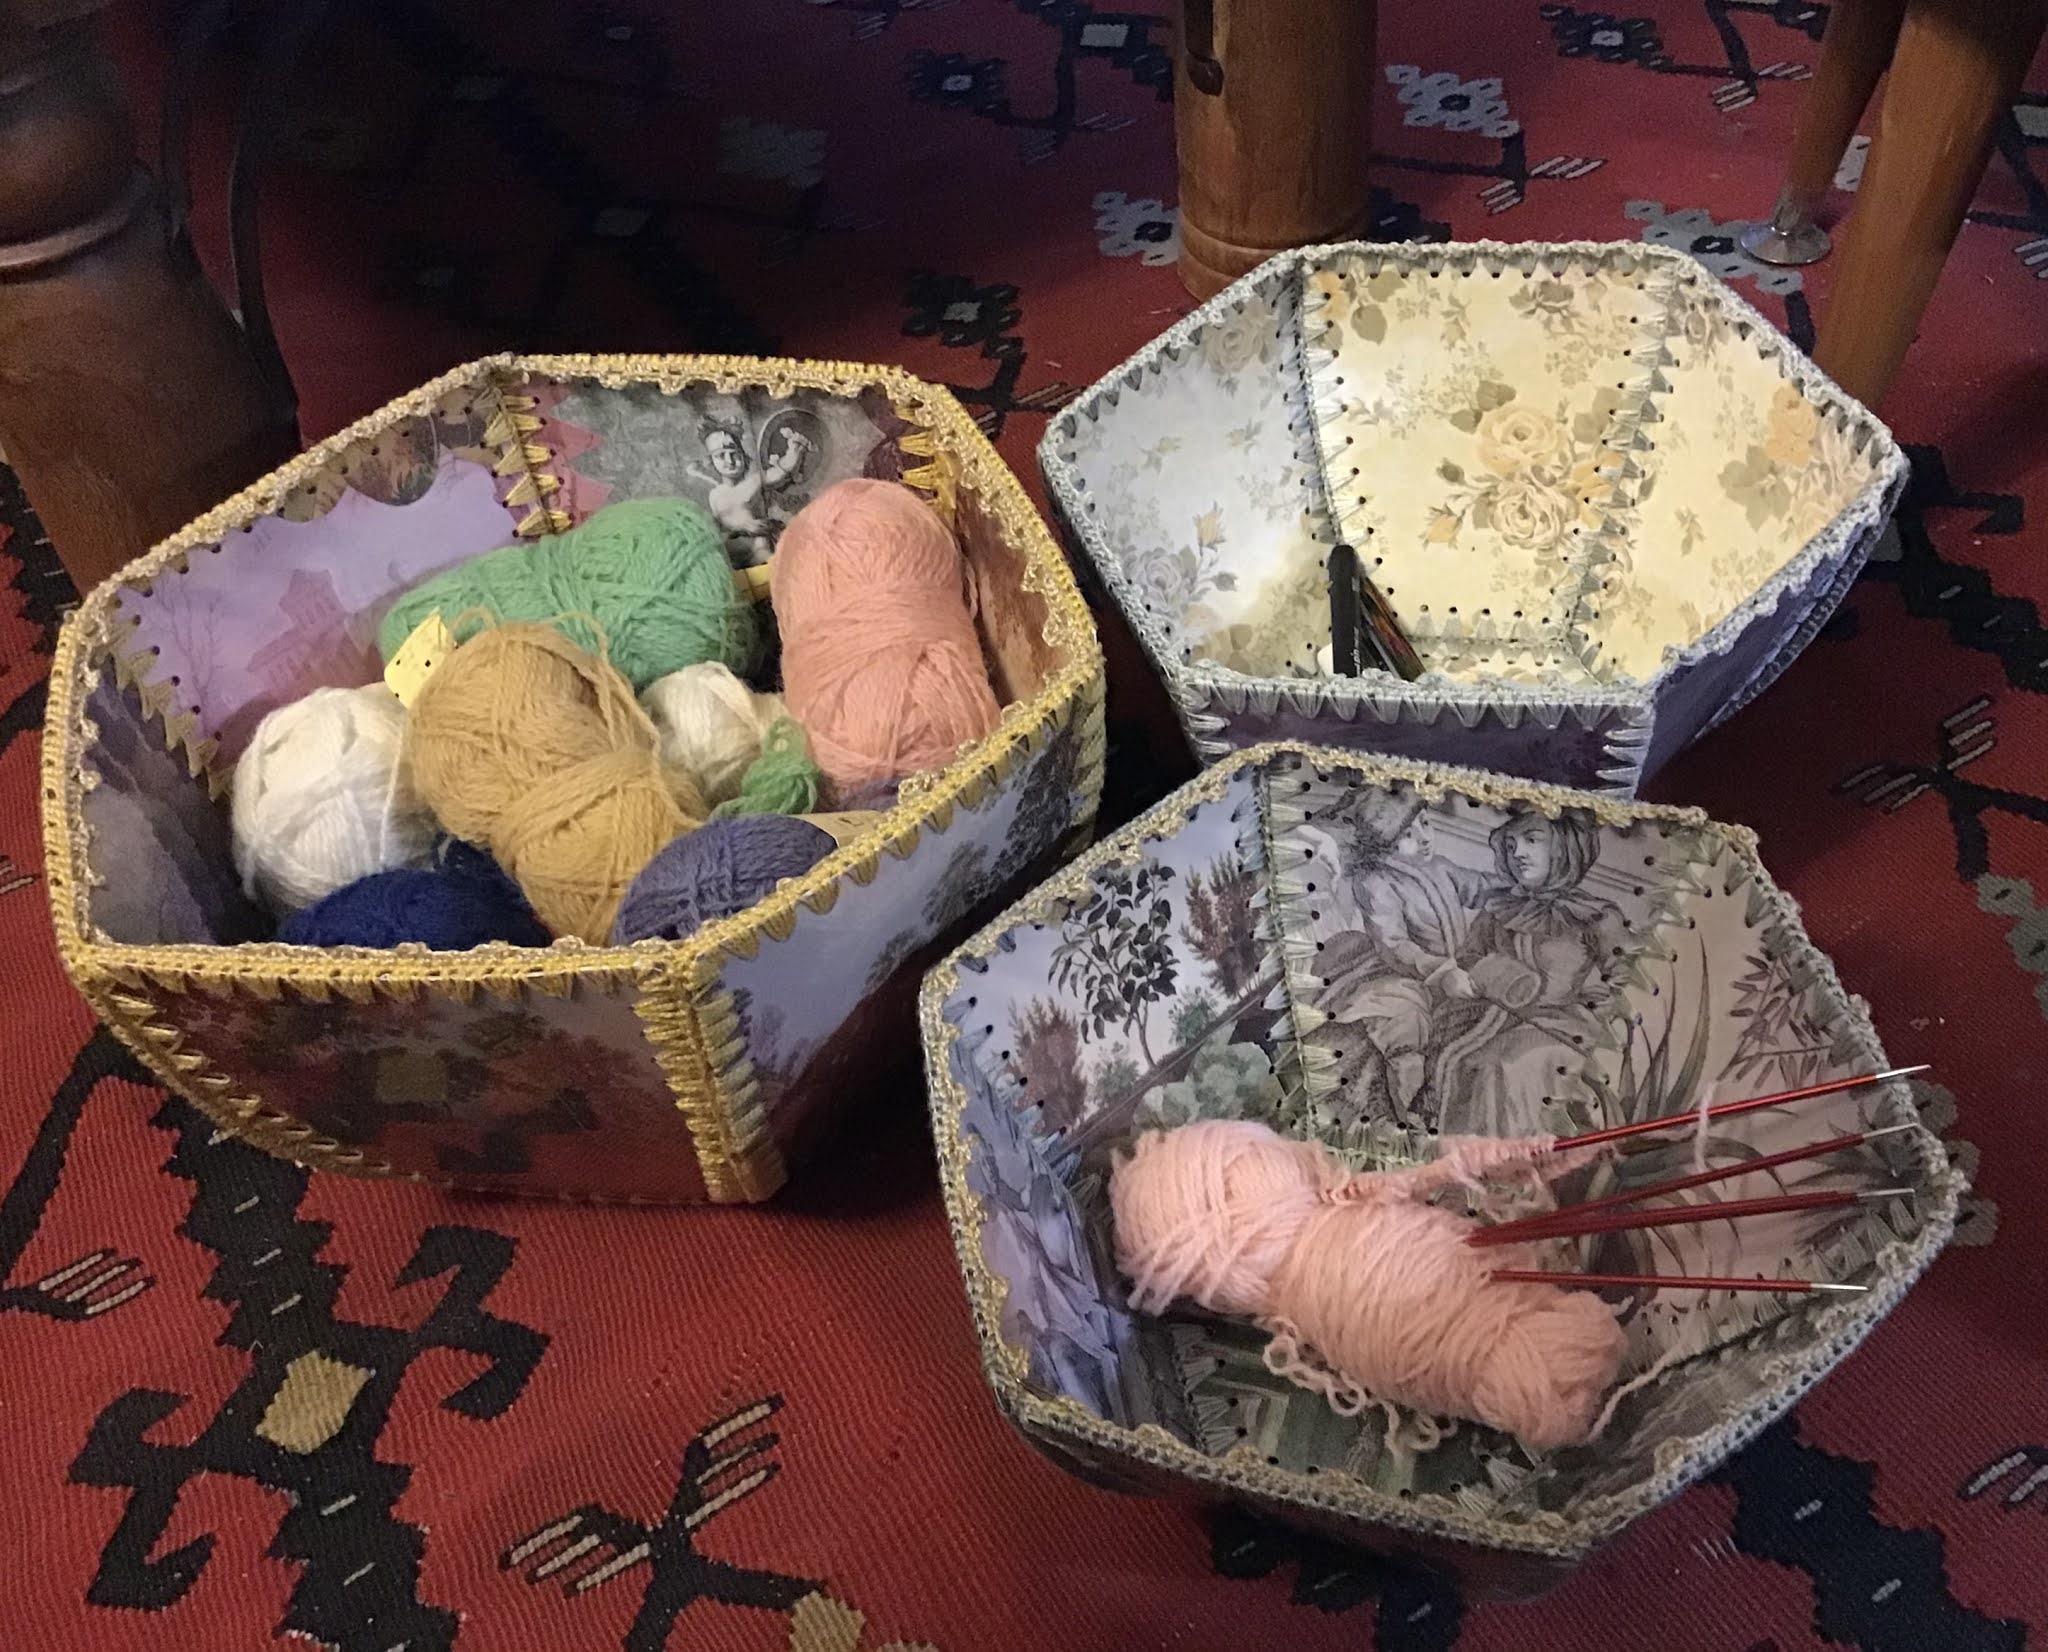
These are very handy. One bowl for the bundle of colours (fair isle cardigan with 9 ish colours) and another for what I’m using, sitting on my lap or table. Stack them together out of the way later. 

I’ve taken to making new boxes and bowl as holiday projects, ignoring my huge list of things I have started, want to do and plan and just cutting loose. Ignoring the fact that I have more boxes than hankies. 


Follow labels below to tutorials, materials lists and patterns.
Or go HERE.


Friday, January 01, 2021

Just Did It.

 Following on from the last post...


It’s quite a good size, maybe could be a little lower? I might cut a nest of them to fit inside each other. They’re good have on your lap with the knitting. Better than a bag like when you go somewhere.
Once again, follow the label Crochet or Tutorial to find patterns, instructions and other ideas for your crocheted card experience.


Thursday, December 31, 2020

Relaxing Indulgence Crafts. My New Knitting Bowl.


I found a book of fancy repro etchings, for $6 or something (ages ago) just for this sort of purpose. But you can use anything... photos, book covers, musical scores, art books, kids drawings...


This set of yarn bowls is different than the last one I made, or the last couple. No lid for starters. The lid is annoying on the last one. I never ever use it as intended (for yarn to come through). Ever.
For a tutorial to make these in any shape or form, go HERE and for lots of other crocheted card thingy's I have made and drawn patterns for, go HERE.
If you print out the diagram at A4 it should be right. I don't think a bit different will matter much. Then, slice 3-4mm off the sides and lower edge of the side and off each side of the hexagon. This makes the medium sized bowl. Repeat for the smaller one. I decided the big bowl’s sides we’re quite high so took 10mm off the rim for the medium and a further 4-5mm for the smaller.

Go to the next link for more pictures of the three sizes in a subsequent post:


Sunday, August 30, 2020

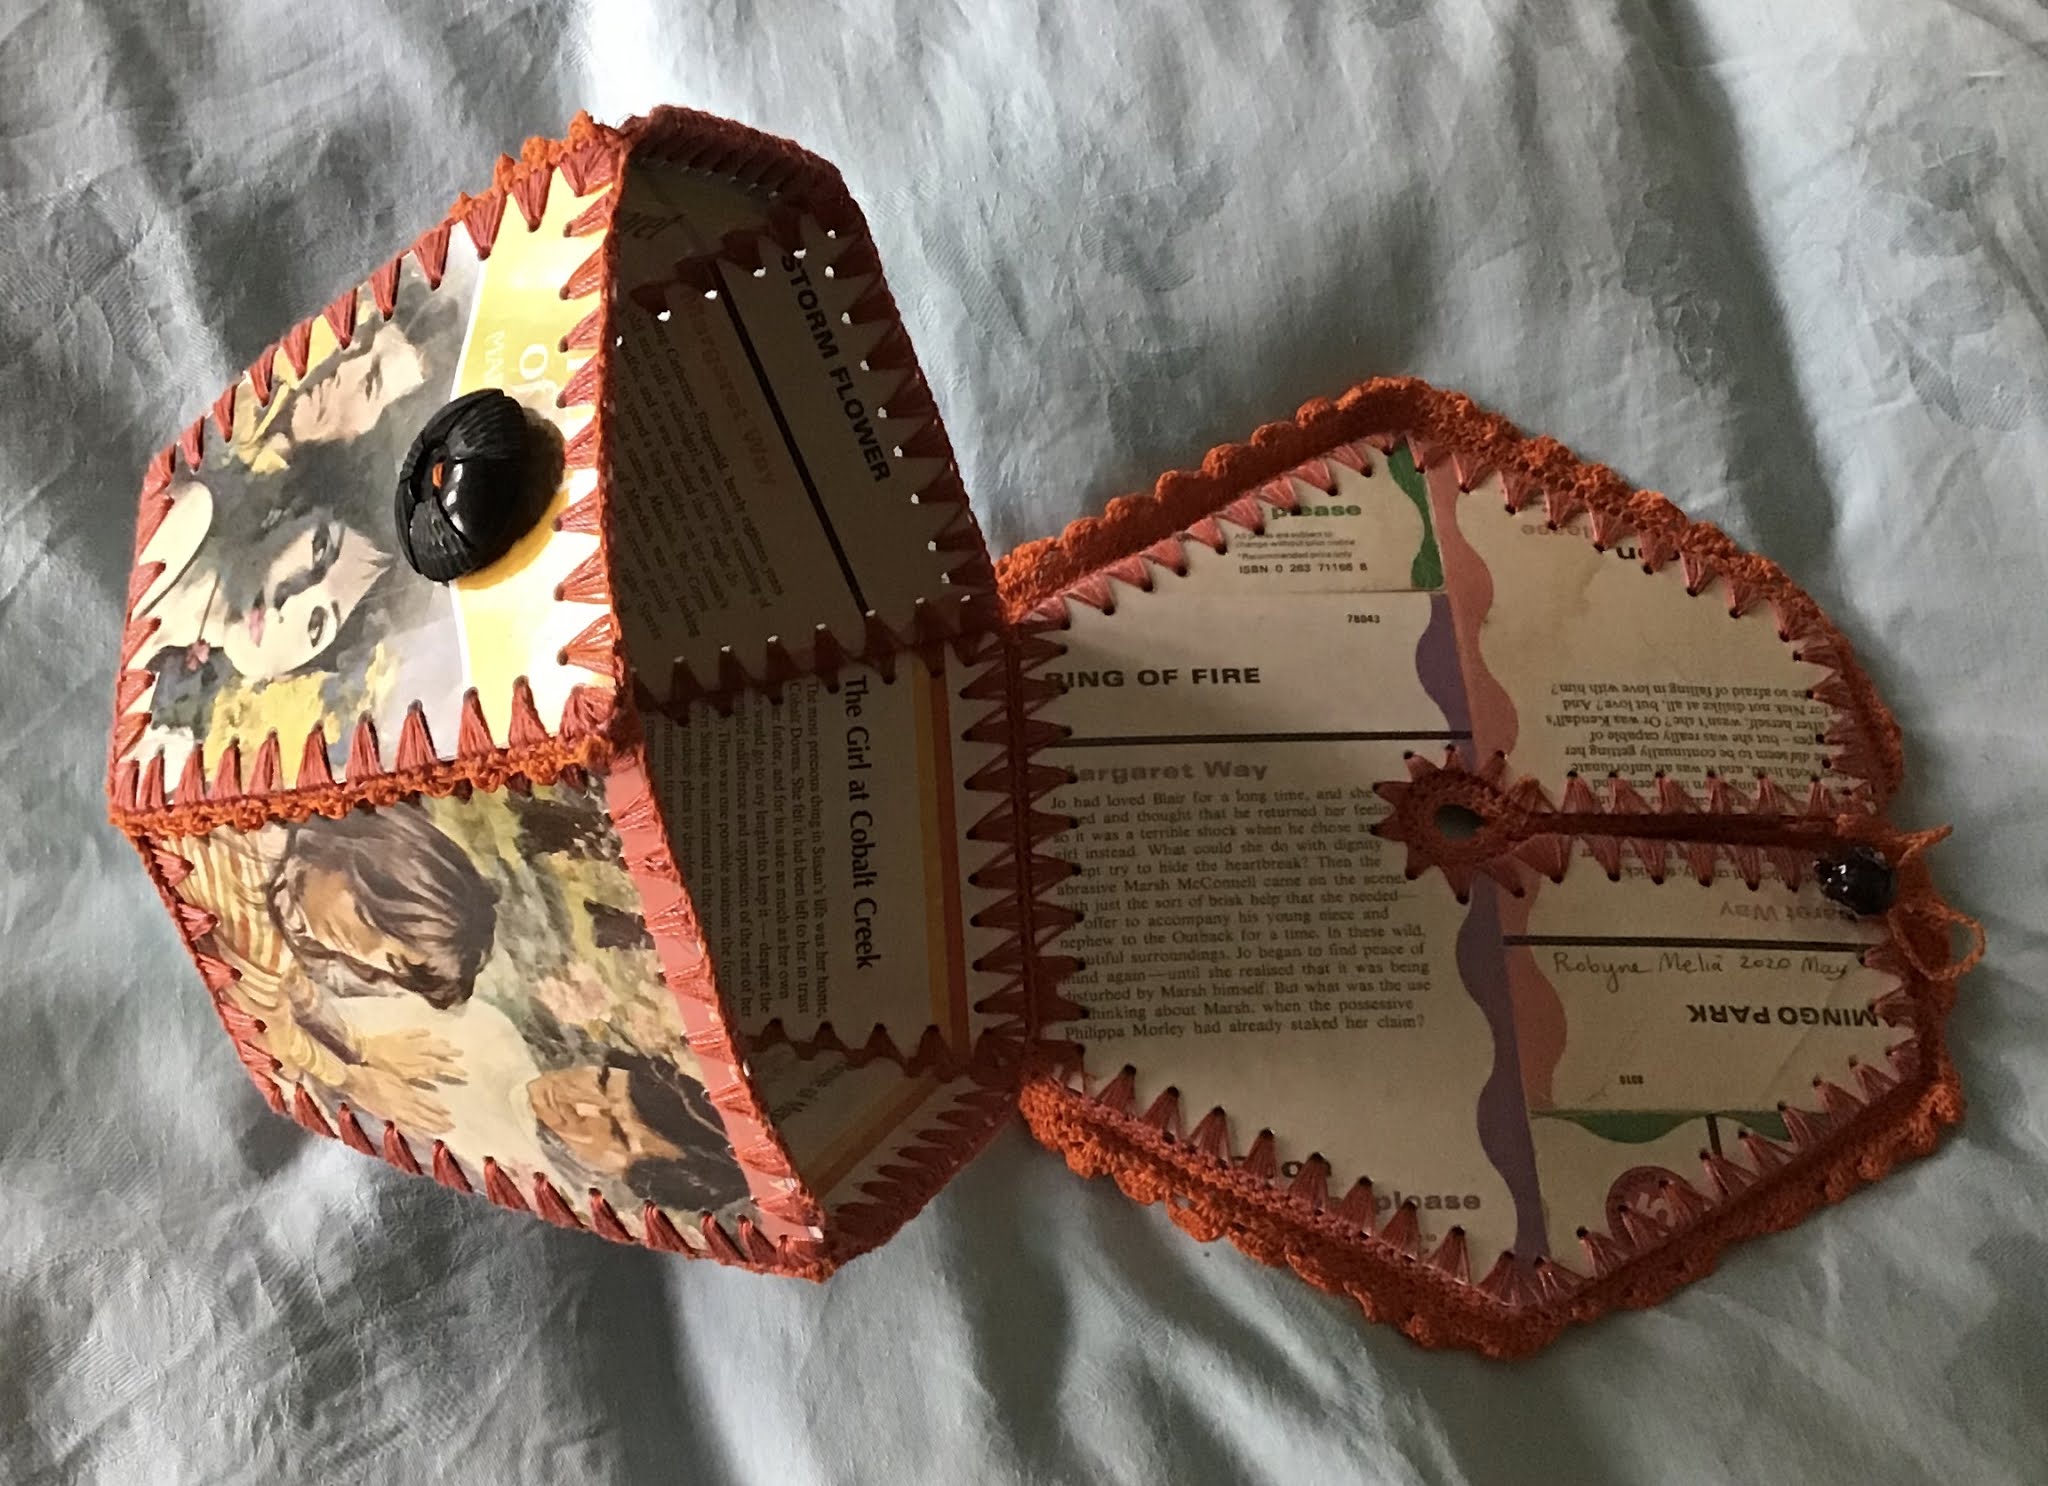
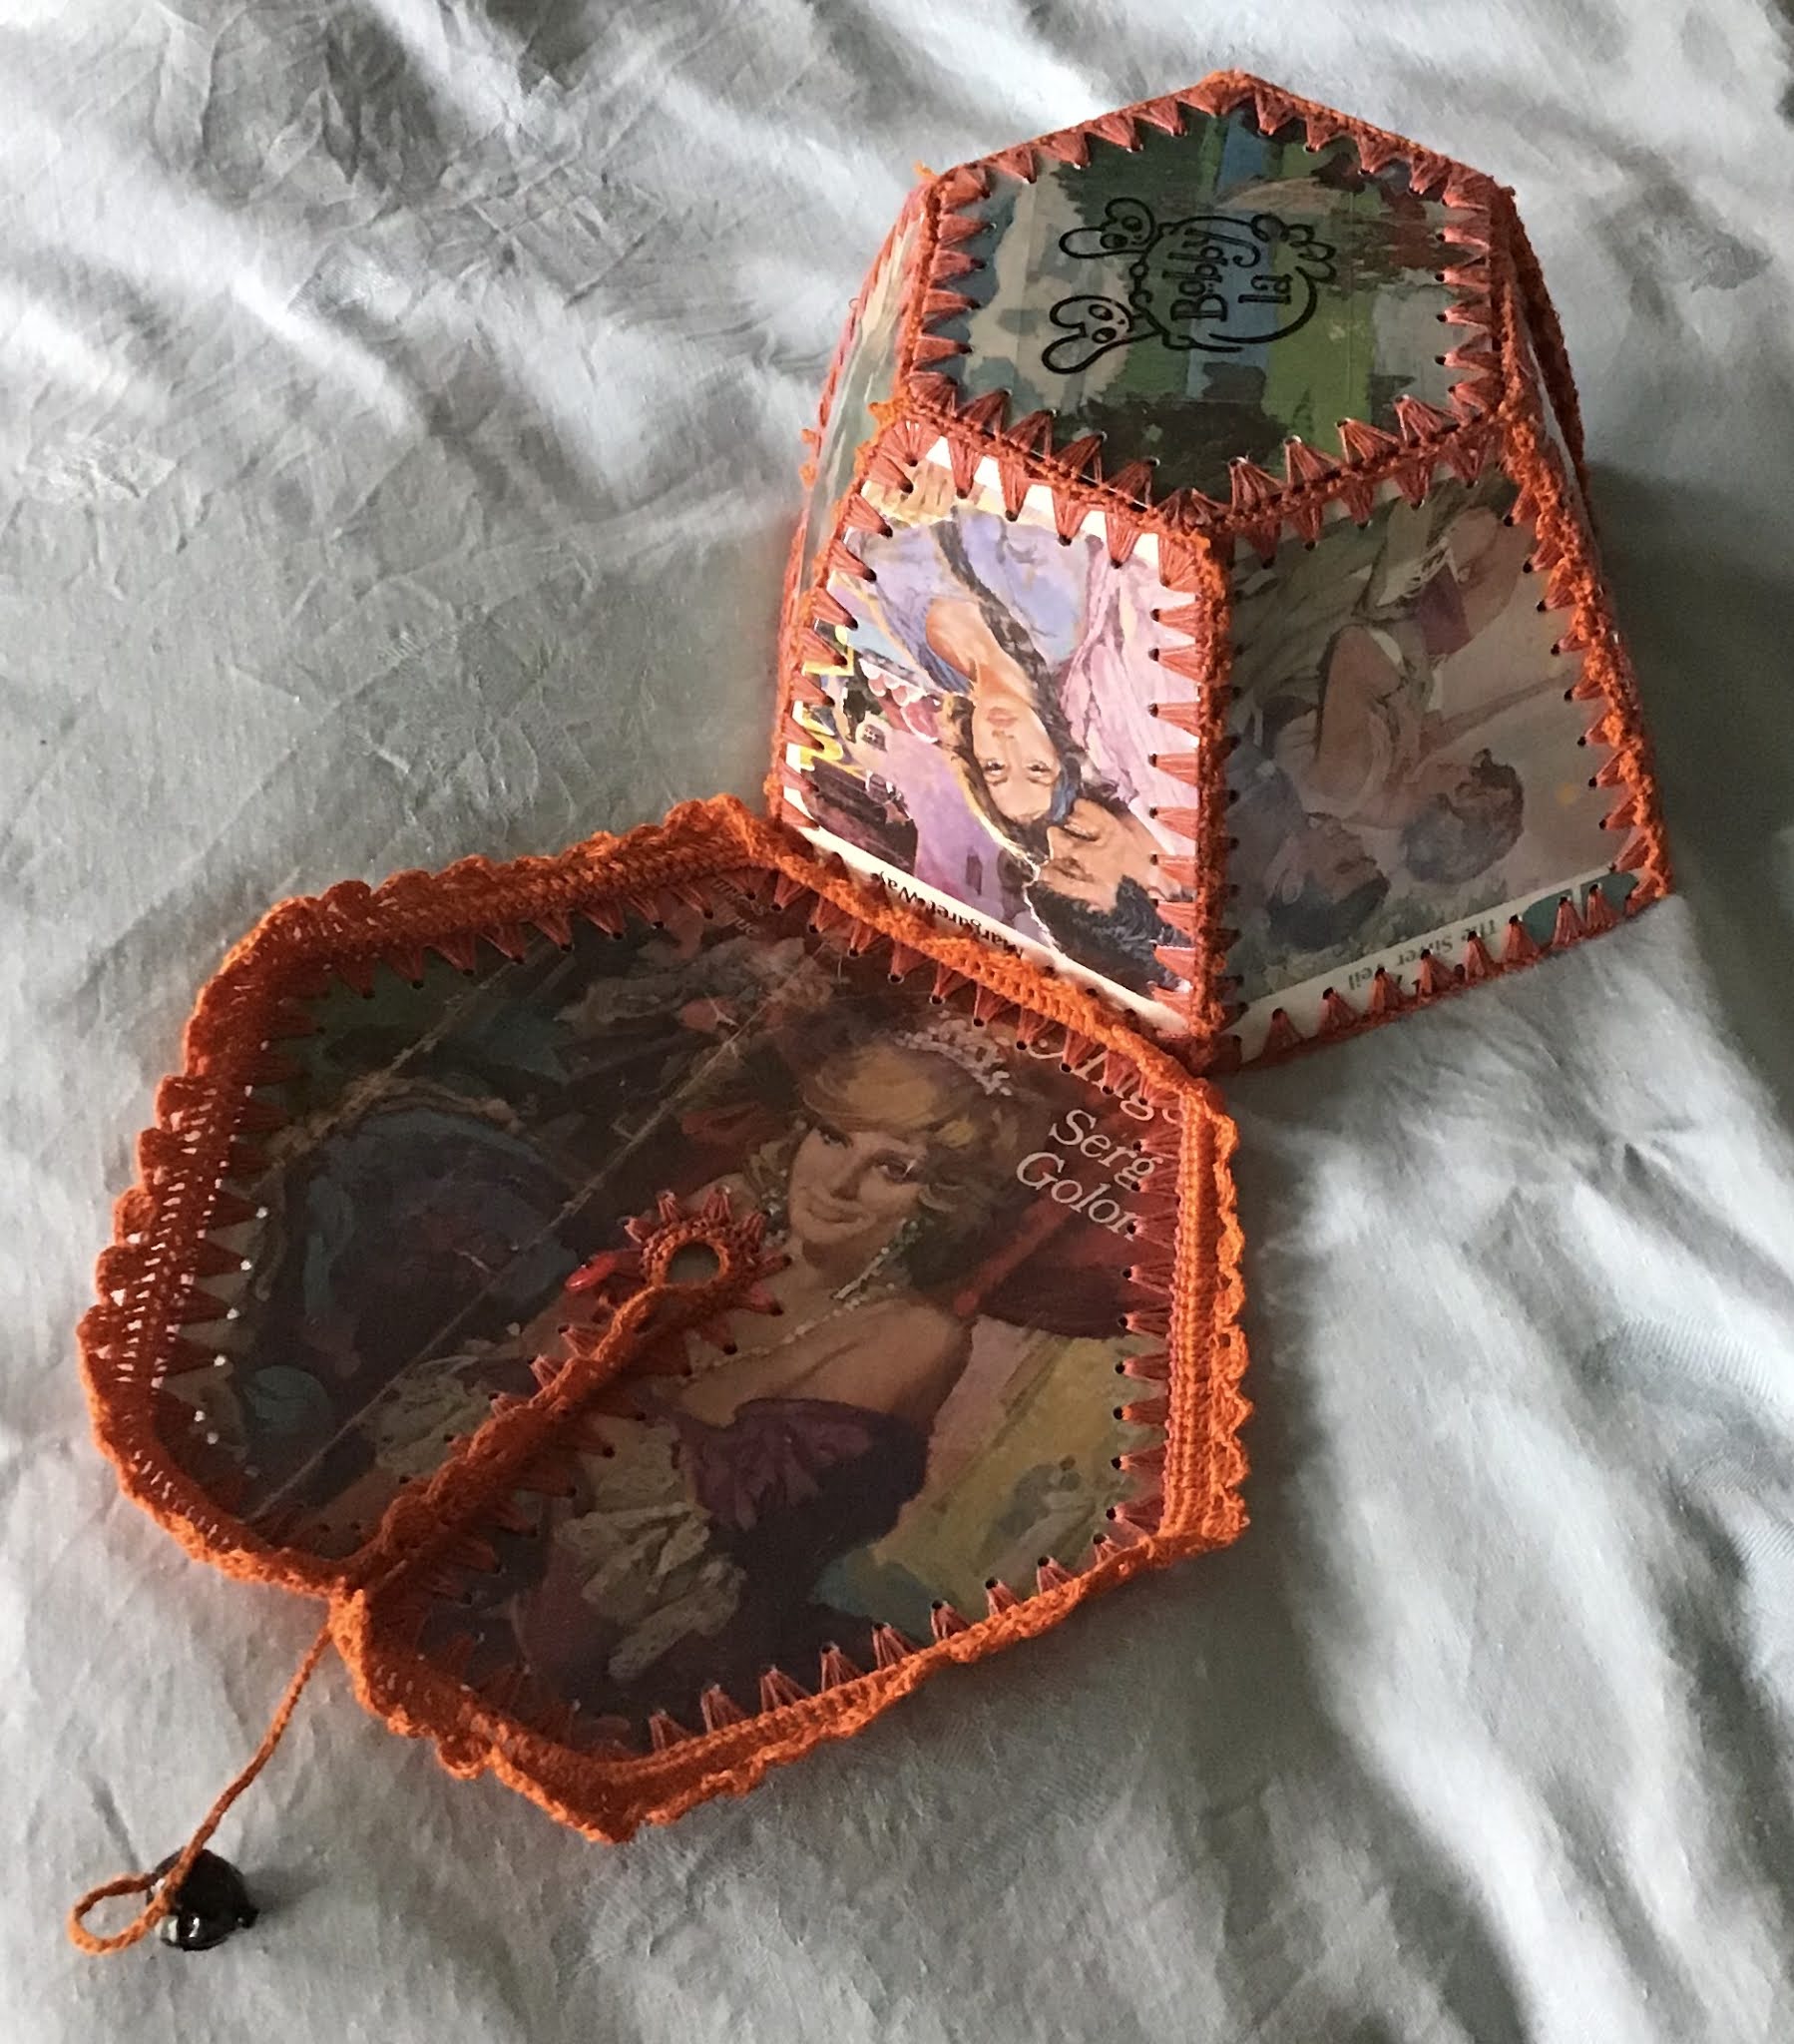
Crocheted Card Yarn Bowl With Lid


 Here is the pattern for my Yarn Bowl. I have made a tutorial which also gives links to where I bought my hole punch and the plastic sheets I use to cover the cards.

With this one, the vintage Mills &Boon romance penny dreadful covers (plus a fantastic 60’s book) make the outside and I’ve used the back covers on the inside. The names of these books are as crazy as the covers, along with the synopses. I’ve used the pages from the stories on the sides or backs too, the naughty bits. But I’m getting too old to even find it ironically funny. Now it’s a bit ew! Not is a prudish way, just in a for goodness sakes, that’s ridiculous way. 

If you follow the tags below (boxes, crochet, tutorials, etc.) you’ll find the tutorial, other patterns and ideas. Here is one directly: http://robynefmelia.blogspot.com/2010/01/box-tutorial-sort-of-thing.html