Showing posts with label Tutorials. Show all posts

Saturday, August 15, 2026

Steeks: The Crocheted Reinforcement


A steek is a bridge a ‘bridge’ of stitches over what will later become an opening for an armhole, cardigan front or neck. The purpose of a steek is to enable knitting in the round, thus staying on the right side, rather than having to knit back and forth with purl stitches on the wrong side. This is particularly useful when doing colour work or complex designs. The steeks are later cut up the centre, leaving a seam.

Don’t be daunted by the cutting. Everyone will tell you that it’s easy and that you’ll never look back, because it’s true. You will never look back, having tried it once.

Whilst knitted cloth unravels across the rows, rather than down the columns, slippery yarns will still fray and need to be dealt with before cutting.

Note: with sticky Shetland or Scandinavian type wools, you can felt the steeks or simply make a running stitch either side of the centre column before cutting, or do nothing at all until the garment is complete.
Search in the labels 'Glossary', 'Tutorials' or 'Knitting' or go HERE to see the post on Steeking With Sticky Wool

The crocheted method is to make a chain along both sides of the central stitch. It's drawback is that you make a slightly bulkier seam, which can be averted somewhat by using a finer yarn than in the garment.

I have added 7 steek sts.

The reinforcement line is made through one leg of the centre stitch (column 4) and one leg of the stitch beside it (column 3 or 5). That is, you crochet together half of the centre stitch and half of the adjacent stitch, with the hook pointing into the centre as shown in the diagram above.

To secure the beginning, make a slip knot, then pop it on the hook. Put the hook through at position (5), then wrap the yarn around so you encompass the cast on edge. Hook it through the slip knot, making the first chain stitch. Now, following the arrows, slip the hook through one leg of column (5) and 1 leg of the central stitch (4), wrap the yarn around and pull it through. Continue up the column, with the hook pointing towards the centre as you see on the diagram.

When you reach the top, catch the cast-off edge.

Cut the yarn with enough tail to sew in and pull through the remaining loop to secure. Turn and repeat down the other side.

The centre steek stitch now has been reinforced, with half of it in each row of crochet. When you pull these rows apart a little, you will see a ladder between them. With care not to snip the reinforcement, cut through this ladder.

Trim or tidy excess after blocking. Once the sleeves are finished, you can stitch the seam in place, being careful to allow room for movement and not stitch through to the right side. For this, a light whip stitch will suffice.

Note: You could work the crochet lines one column across on each side, to give a narrower seam. Pick up one leg of column 6 & 5 or 2 & 3 instead, leaving column 4 free. You will still cut up the middle of column 4, then trim what will be a little more debris, after blocking.

Steeking With Sticky Wool

A steek is a ‘bridge’ of stitches that joins what will later become an opening for an armhole, cardigan front or neck.  The purpose of a steek is to enable knitting in the round, thus staying on the right side, rather than having to knit back and forth with purl stitches on the wrong side. This is much easier when knitting colour work.

With Shetland or Scandinavian, or any other sticky wools, you can felt the steeks, simply make a running stitch either side of the centre column (down positions 3 & 5) before cutting, or... do nothing at all until the work is complete, as I do. 

A super wash or otherwise slippery yarn will need extra reinforcement and I will add a post titled: The Crocheted Steek Reinforcement. Look in labels under glossary, tutorials, knitting or crochet.

Column 4 (above) is the beginning and end of a new round (you can see the jog in the photo, below left). I join my yarn here and may end up with a lumpy stitch of 4 strands. Otherwise, it is the darker of your colours. Switch from dark to light to dark as shown, giving you a darker edge column on each side of the steek. This makes it easier to distinguish the steek from the garment and makes a distinct line to follow when picking up stitches.

If the steek is for a sleeve and the shoulders are grafted together, include the steek in the shoulder graft, folded at the arrows so that columns 1 & 7, 2 & 6 and 3 & 4 are grafted together, with the centre steek (grey arrows on diagram or red at left) set aside on a stitch holder.

Some prefer to cut the steek before picking up new stitches and this may be easier at times. I tend to pick up along one side, then cut the steek to make picking up down the other side easier. 

To cut the steek, carefully snip up the middle of column 4. That is, cut the column in half lengthwise. All of your joined ends will either fall away or can be trimmed, which means there is no need for sewing in along a steek. Yay!

Having 7 steek stitches, rather than 5, gives a little wiggle room for neatening. Half of the next columns (3 & 5) will also be trimmed away, later.

Use the edge steek stitch to pick up new stitches for the sleeve or front button band, as shown on the diagram. Note: Pick up 1 stitch for every row, with adjustments/decreases made on the first row of knitting or ribbing. This makes a smoother seam than if you were to pick up 3 then skip one, for example.

Steek with Herringbone stitch: Once the sleeves or bands are finished, trim the steek back to the centre of column 3 or 5. Don't trim too far ahead of your stitching (to avoid fraying): 

Thread a needle with fine yarn or thread in a similar colour and secure, without going through to the fronts. Working from left to right, take a little back stitch (or scoop) along top line (1 to 2), then another along bottom line (3 to 4), in repeat, with the trimmed seam inside. You can press it flat with your fingers. Continue in this way, tucking in the trimmed raw edge as you go. This method is neat, elastic and sits flat. The seams blends into the fabric and will hardly be noticeable.

If, however, you have an unsightly machine-sewn reinforcement as I needed on this adaptation of Alice Starmore's 'Thoroughbred', or just want to hide the seam, you might like to sew a ribbon down the inside as shown. Again, be careful not to stitch through to the front and allow room for a little stretch. A finer Herringbone stitch is still a good option.

Monday, May 09, 2022

A Crack At Making A Knitting Belt


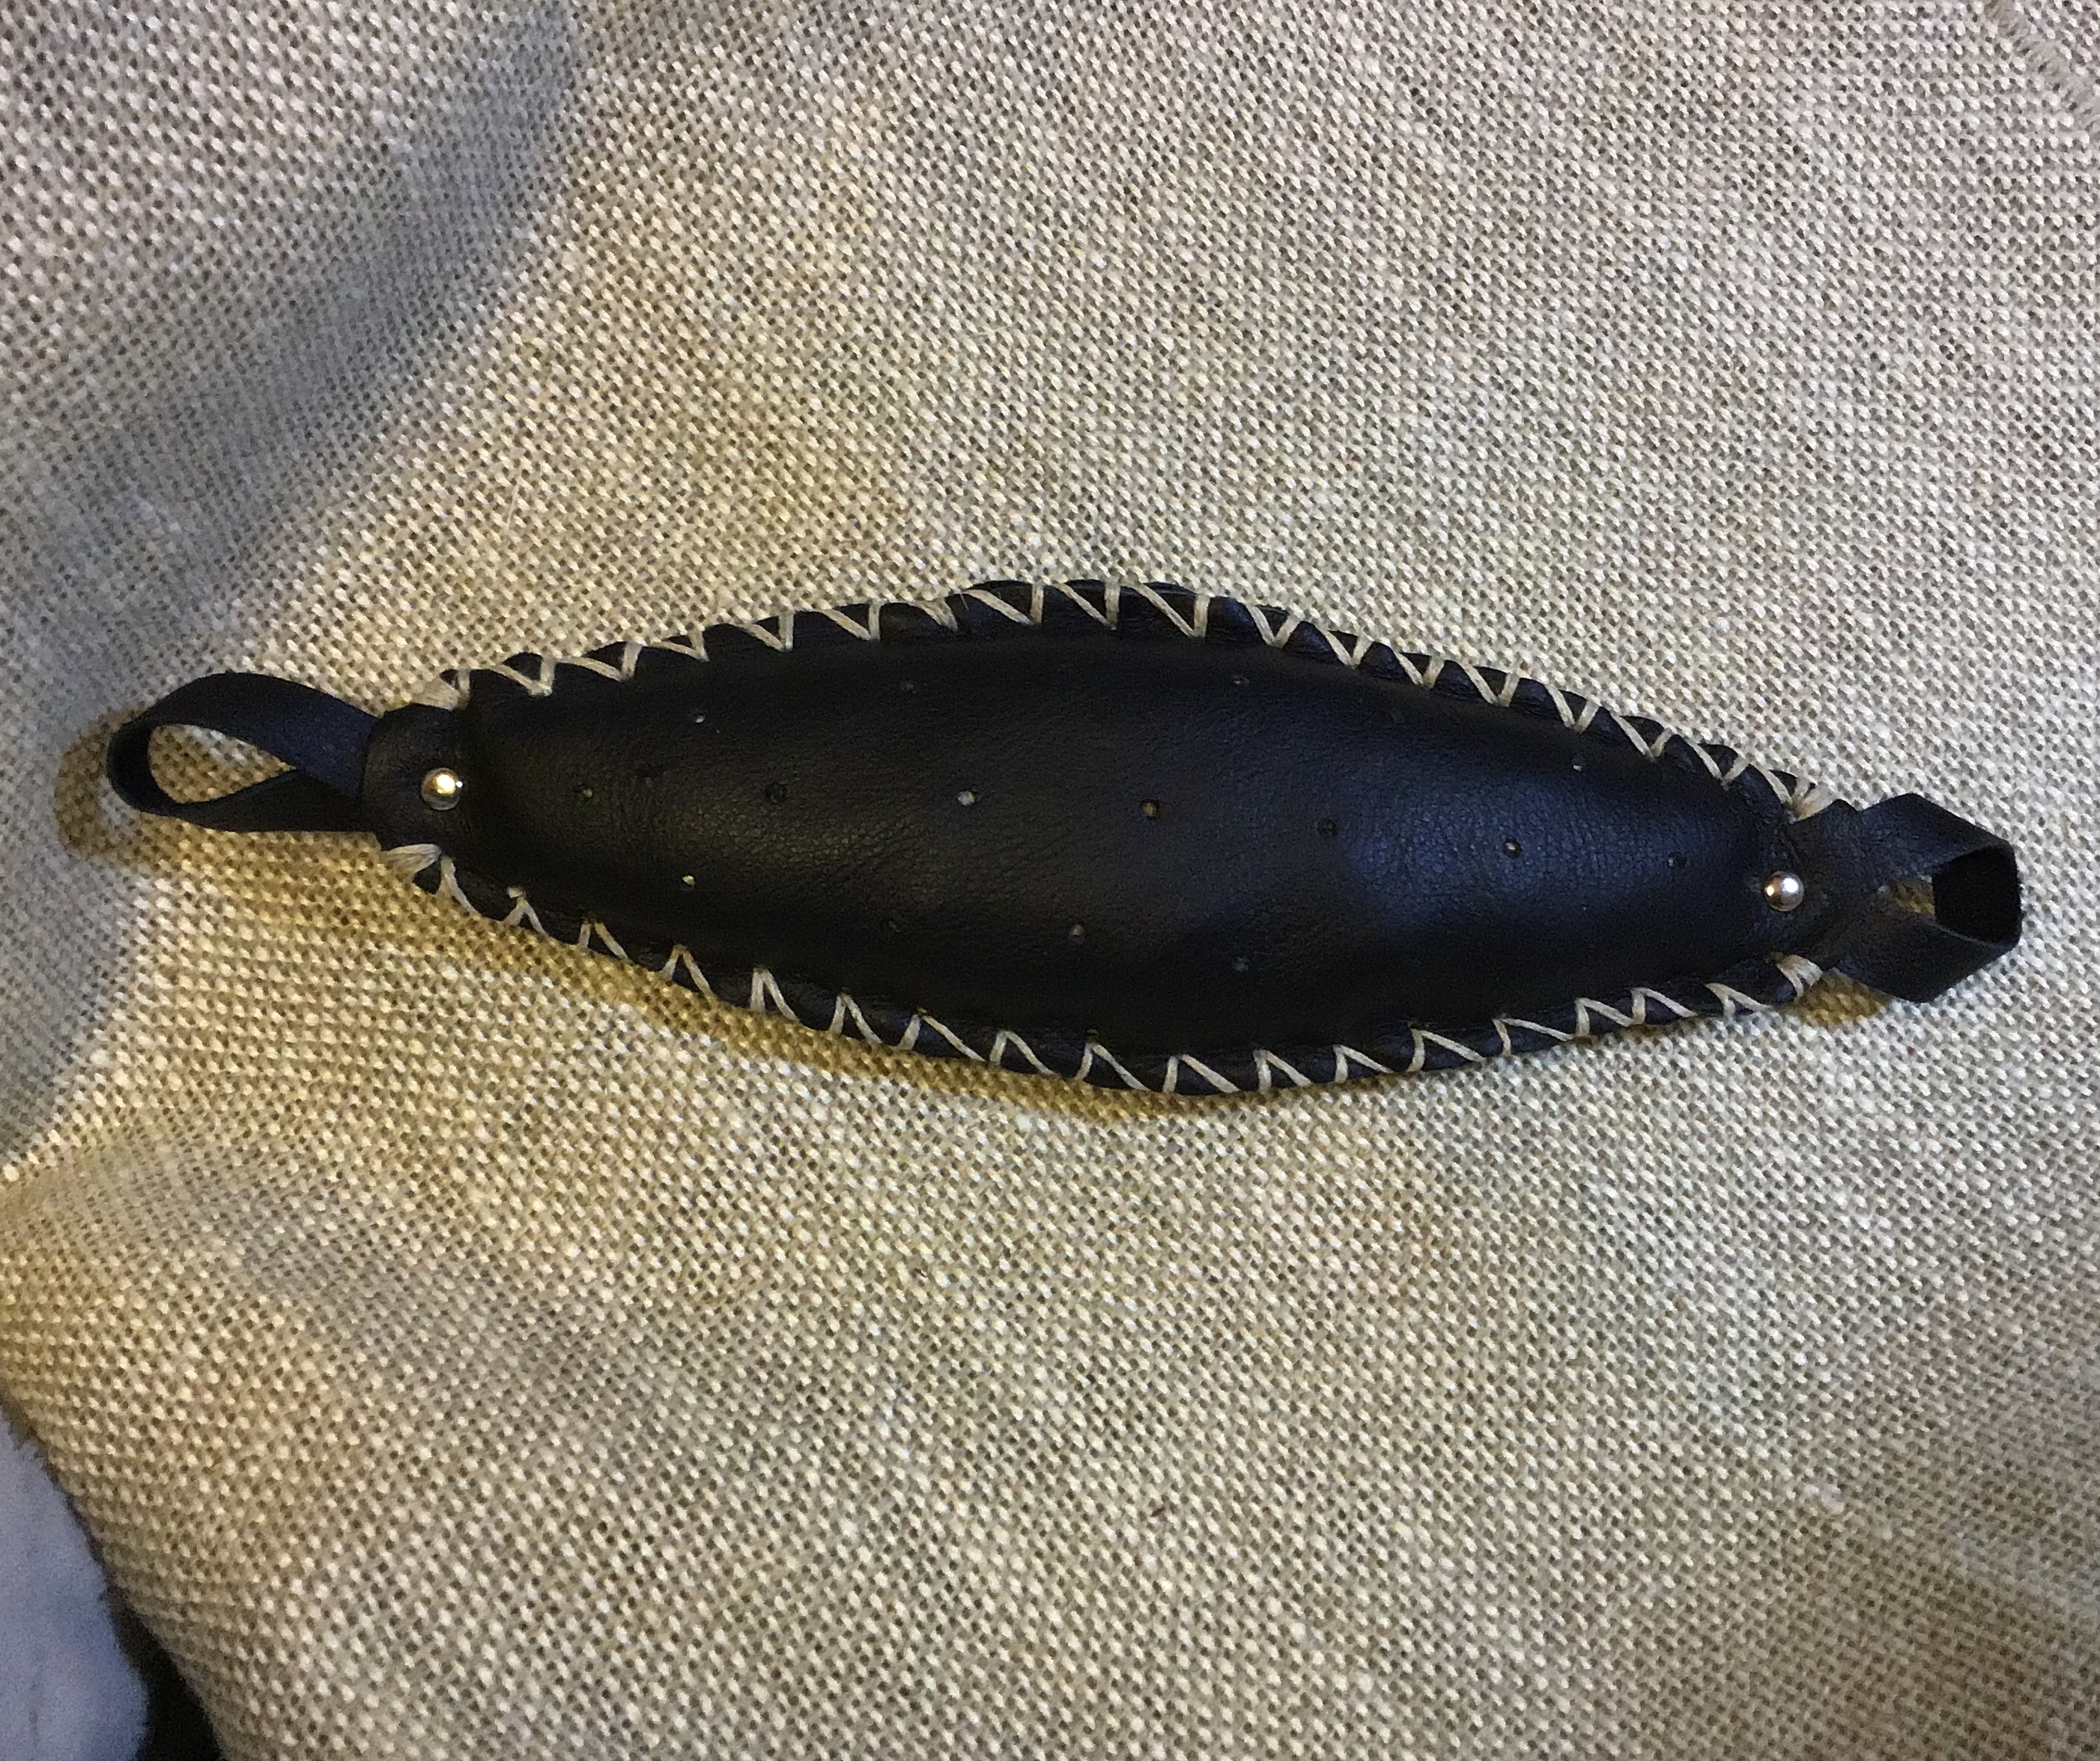
Finished Object. 20 x 9 cm plus loops. For info regarding their use, go here.


After questioning everyone for information (thanks everyone) regarding the use of knitting belts, I have had a go at making one. Much to my disappointment, I had neither horse hair nor coconut fibre at hand, to stuff it. Unusual that I don't have everything I need in my room!
(I've used other stuff now. Pictured below).
I contemplated using a heavy, raw silk fabric (cut into strips and shoved in tightly). Silk was used in ancient armour because it has the ability to slow arrows and swords and such like. I haven't tested the theory so don't try it at home, but it is a gritty, fine and dense fibre. 
Mozzie's won't bite you through the finest silk cloth.
But, I thought, the needle may need to be held somewhat, by the stuffing. So I'll wait (I didn't wait). I looked inside our vintage 1950's lounge suite (it has a massive tear in it) but they've used cotton rag stuffing so I couldn't raid that either. (I later wondered if it might work after all, but too late).

Oh, that's right! I can use sisal and will go immediately to cut a piece off some rope! (I did).

I thought I'd share the process:


I've left the stitching open here, waiting for stuffing. You can see the silver studs or rivets at the ends, through the four thicknesses of leather. Tuck the loops in the ends and bang a stud/rivet through all 4 layers. I did this first, before stitching, so I could stitch right up to the gaps.


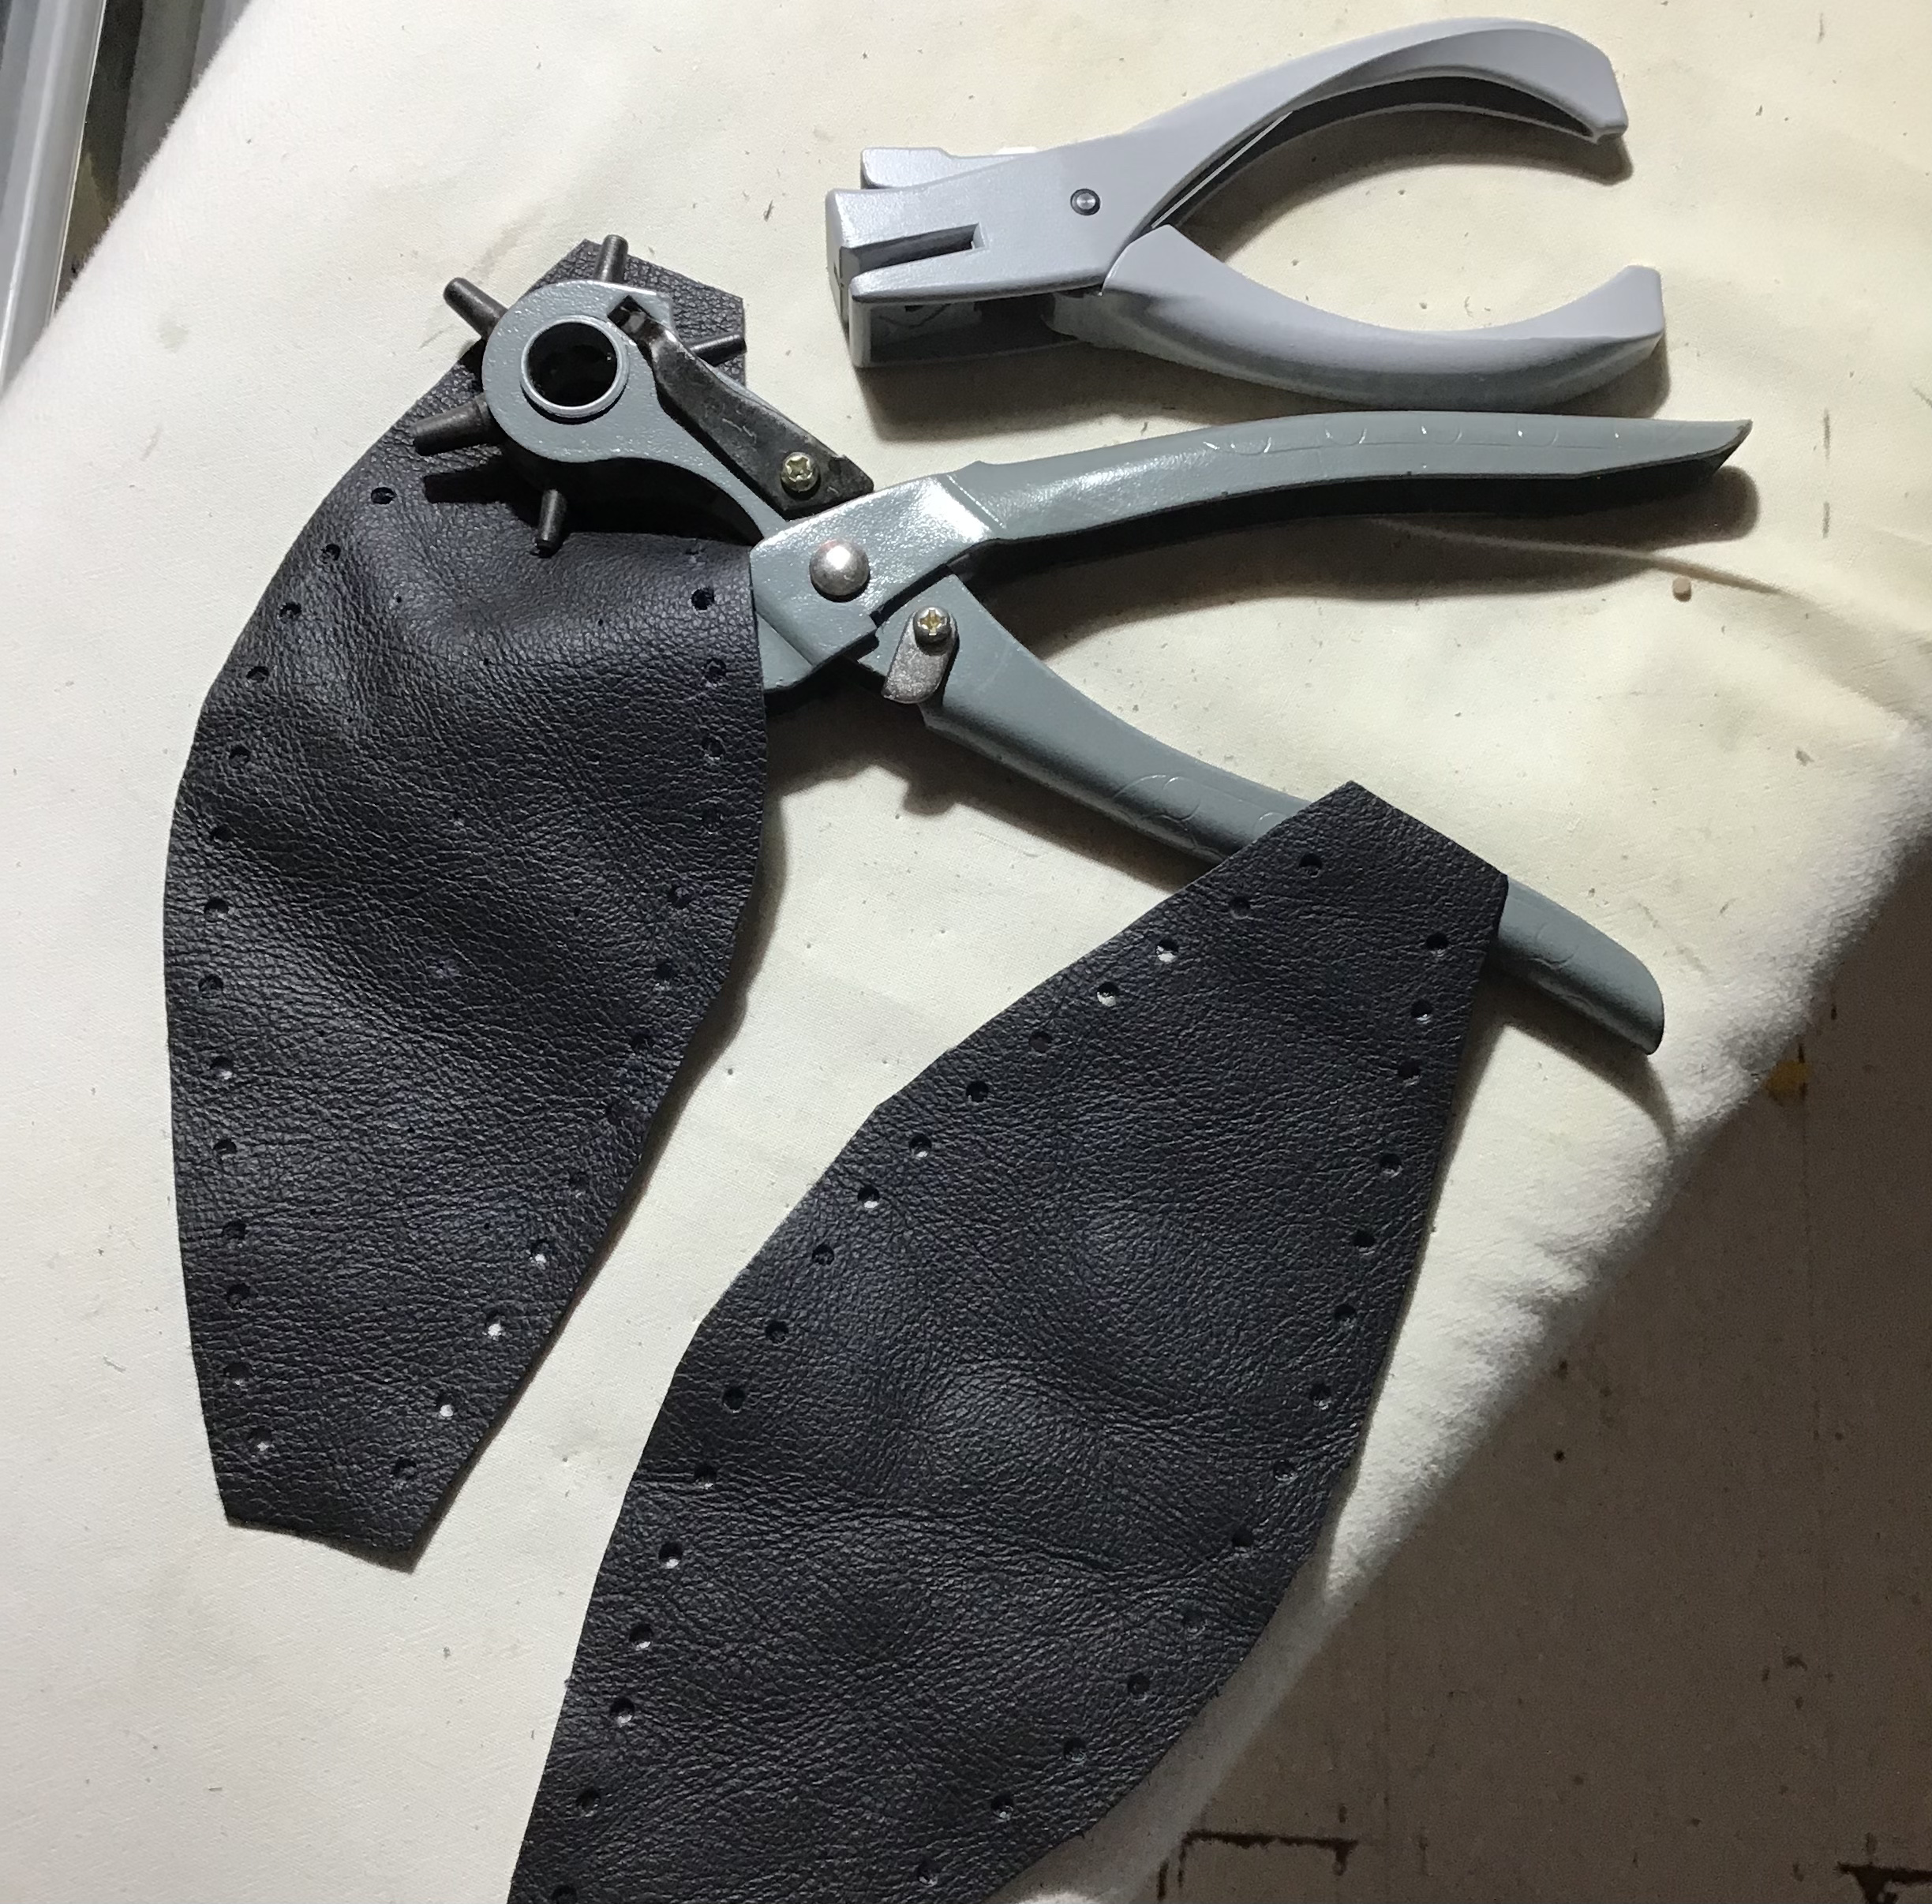
The template is 20cm long and 9cm wide. The holes are roughly 2.5cm apart down the centre, then the outside rows of holes are in between (staggered) and roughly down a line that runs between the side and centre lines. Push a chalky pencil (or poke an awl) through these points to mark the leather, then punch the holes for your needles. Mine are small holes, maybe 3mm at the most... even a little less... because the leather isn't stiff (as it probably should be) so they will stretch soon enough.


I decided to put loops at the ends. I might have had one end with a long strap and a loop at the other, but I don't have a long strap's worth of leather. I'll find something, a cord, some bale-twine. I figure if I have a loop, I can pull the long end through and tuck it anyway so whilst I have plenty of little buckles, I didn't intend to use one. (Update: I purchased a belt strap from a leather worker at the Vic Market for $11 AU, my only cost).

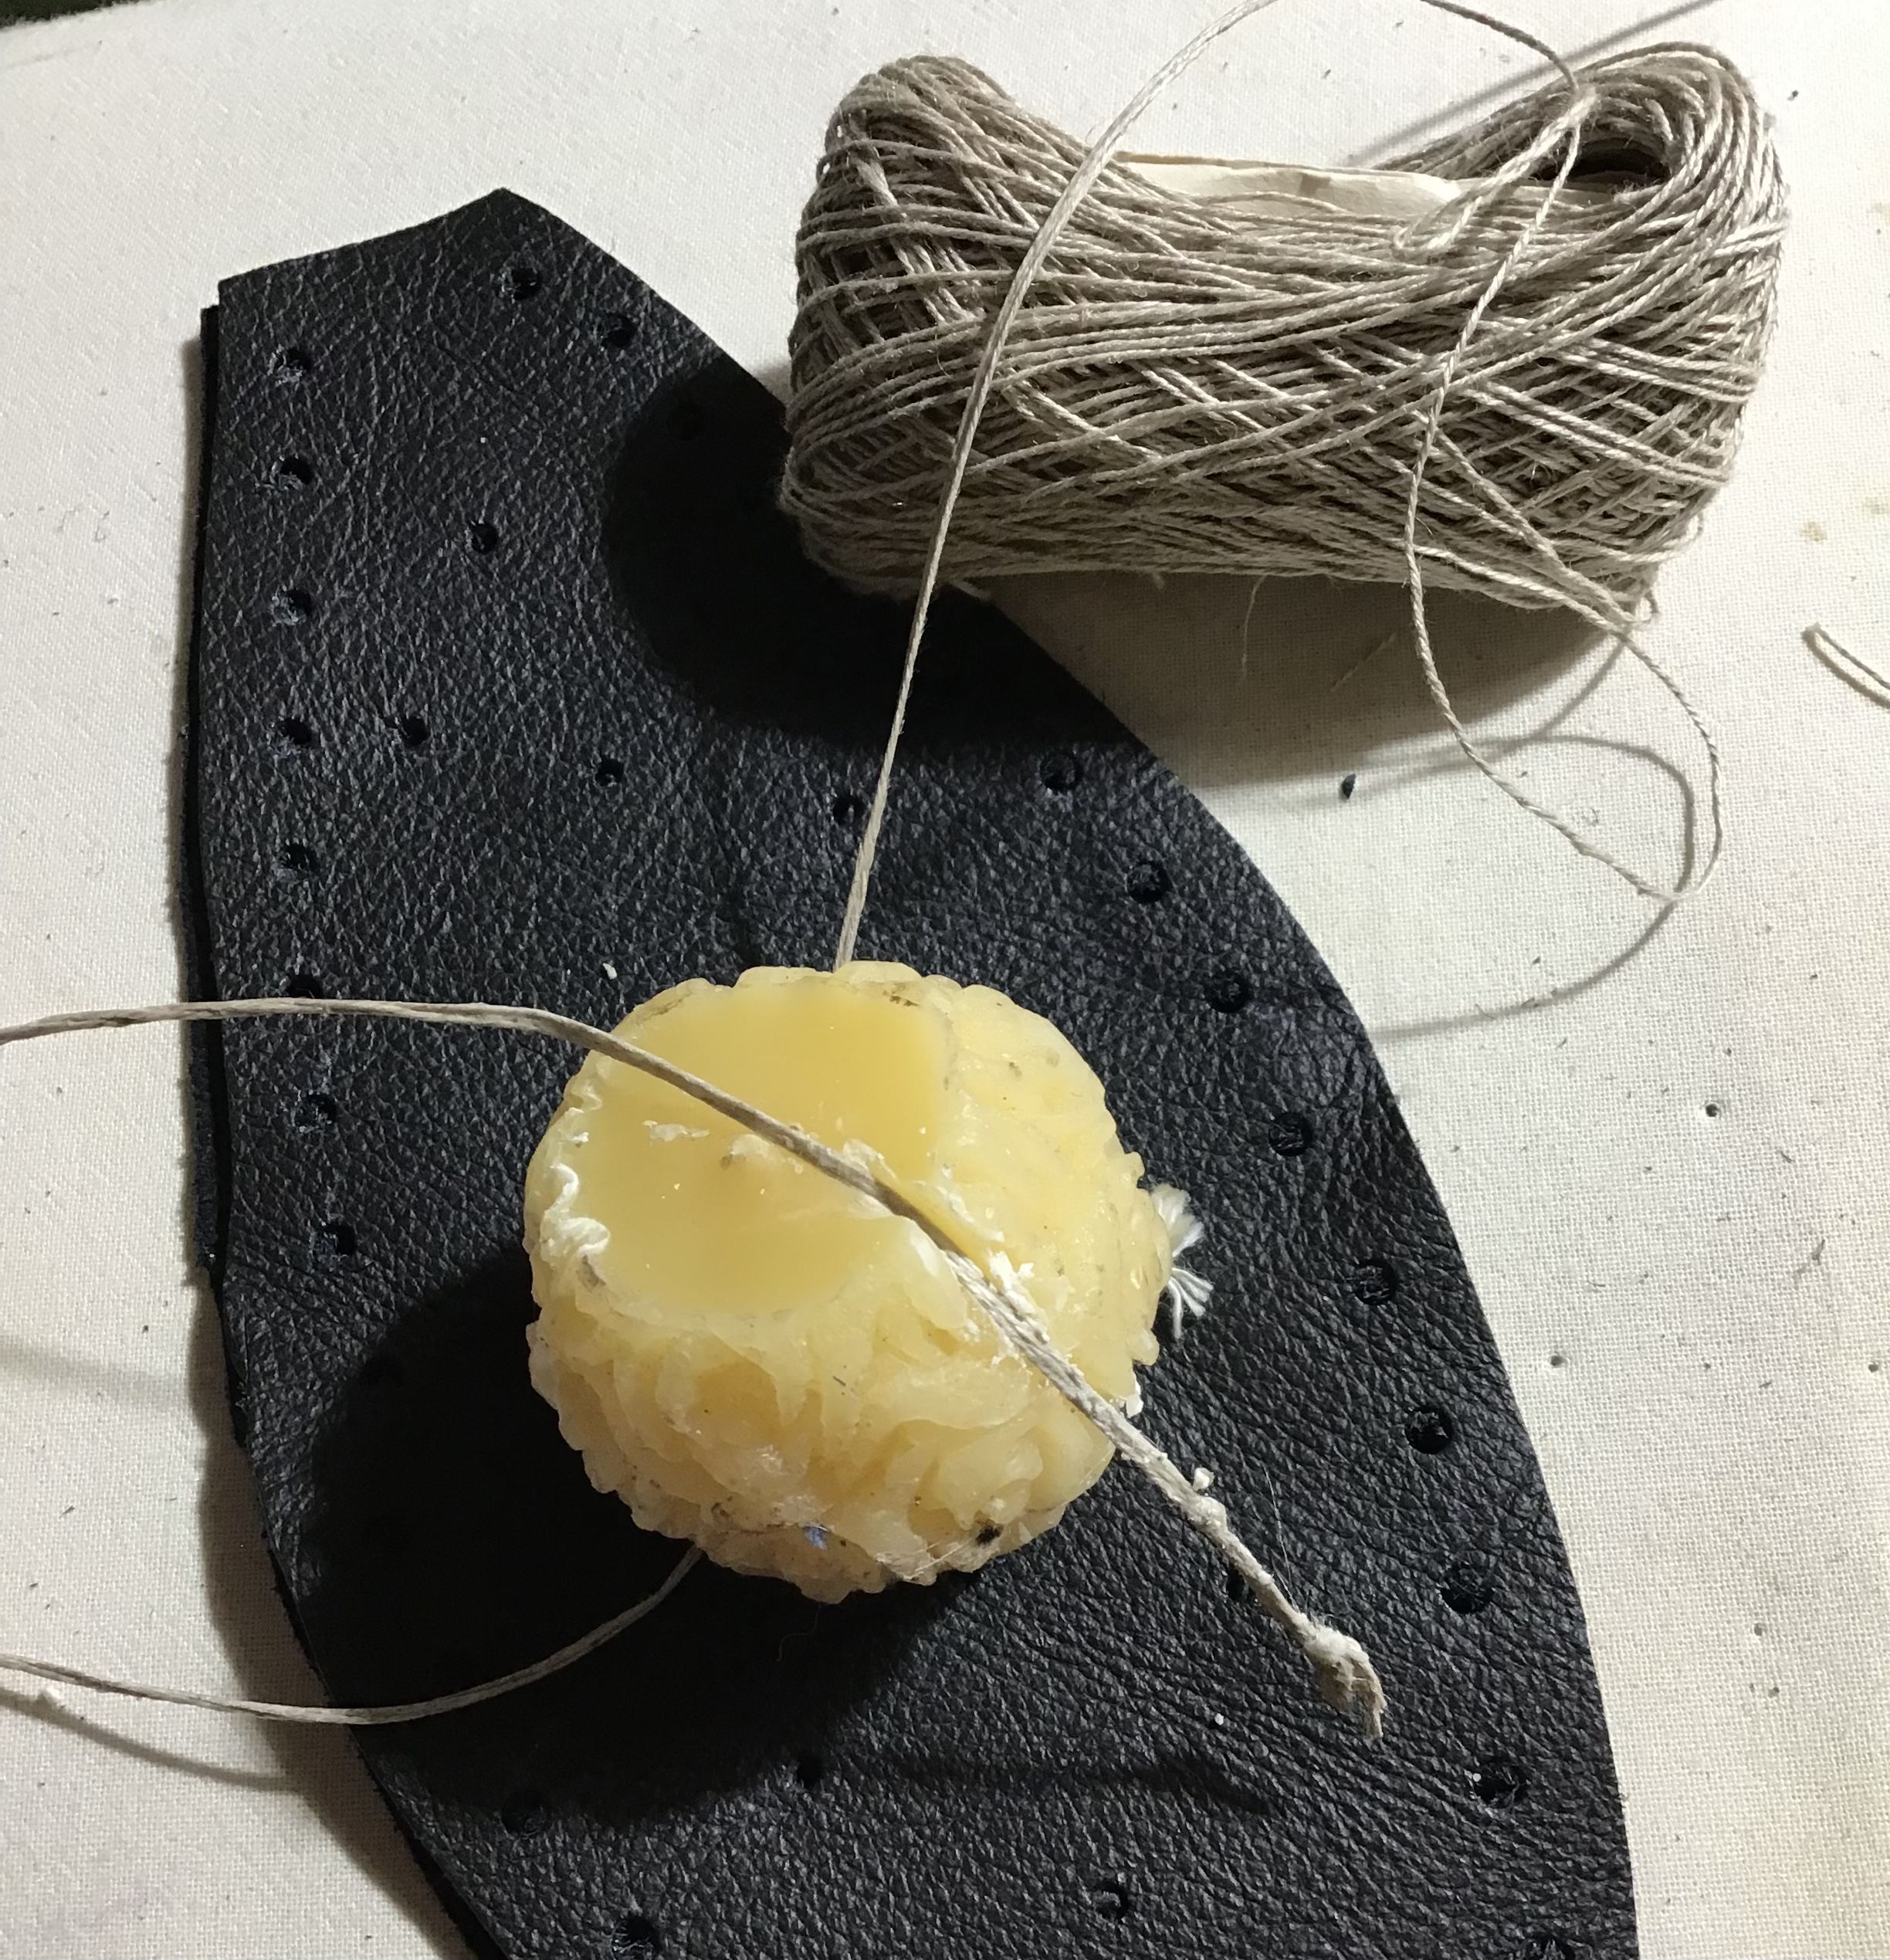
This stitch I know as Glove stitch. I pulled 3 strands of strong linen, together, through a bees wax candle. I left enough at the beginning to secure later (so I could stitch it to itself). 
Bring your needle up through the first hole, now wind around and back and up through the same hole. Next, go around again but up into the next hole. Hold it in place as you go and be firm. Repeat. 
It might have been sensible to run a bead of glue down, inside, before I stitched it... but I didn't want to have a sticky mess.


My pictures are working backwards...sorry about that... 
I punched the edge holes on the smallest setting, then marked the other piece through them, to be sure they lined up. I didn't bother measuring these edge holes, just so long as they are the same top and bottom (wrong sides facing).


My father was a fireman so I never burn candles in the house. Maybe it was our housefire when I was little that put me off? But this little beauty is very handy for things like this or to strengthen thread for quilting  (if I did quilting anymore that is, and I might yet).


Careful not to mark them one way and then try and put them together the other way, like I did. The holes didn't line up!

I've ordered long double pointed needles in a couple of brands (ok, three brands. 40cm and 35cm. It's my birthday next month so I crumble willingly over the Paypal button). 

I'm looking forward to trialling the method. I've been noticing that when I use dpn's, I 'prop' the right needle a bit already, so it seems a natural next step.


EDIT: Here we are, I found some stuff! Jute from a coffee sack, nylon tulle cut into 5x5cm bits, heavy linen (heavy rug hooking open-weave), strands of jute from a coffee sack and some ancient (possibly) mariners (or fireman's) rope from my (fireman) Dad. 
Ready to go, after I pulled the rope bits. Yay!

Next, obviously, stuff it. Poke the filling down with a blunt object. Do a little at a time and compress it firmly as you go (don't wait until it's all in before shoving it down).
Now finish off the stitching or binding and secure your ends well.

I have made a template in pdf but have to figure out how to add it.... in the meantime, here’s a pic. 

Monday, January 11, 2021

Two Would Have Done It But Bad Luck, I Made Three

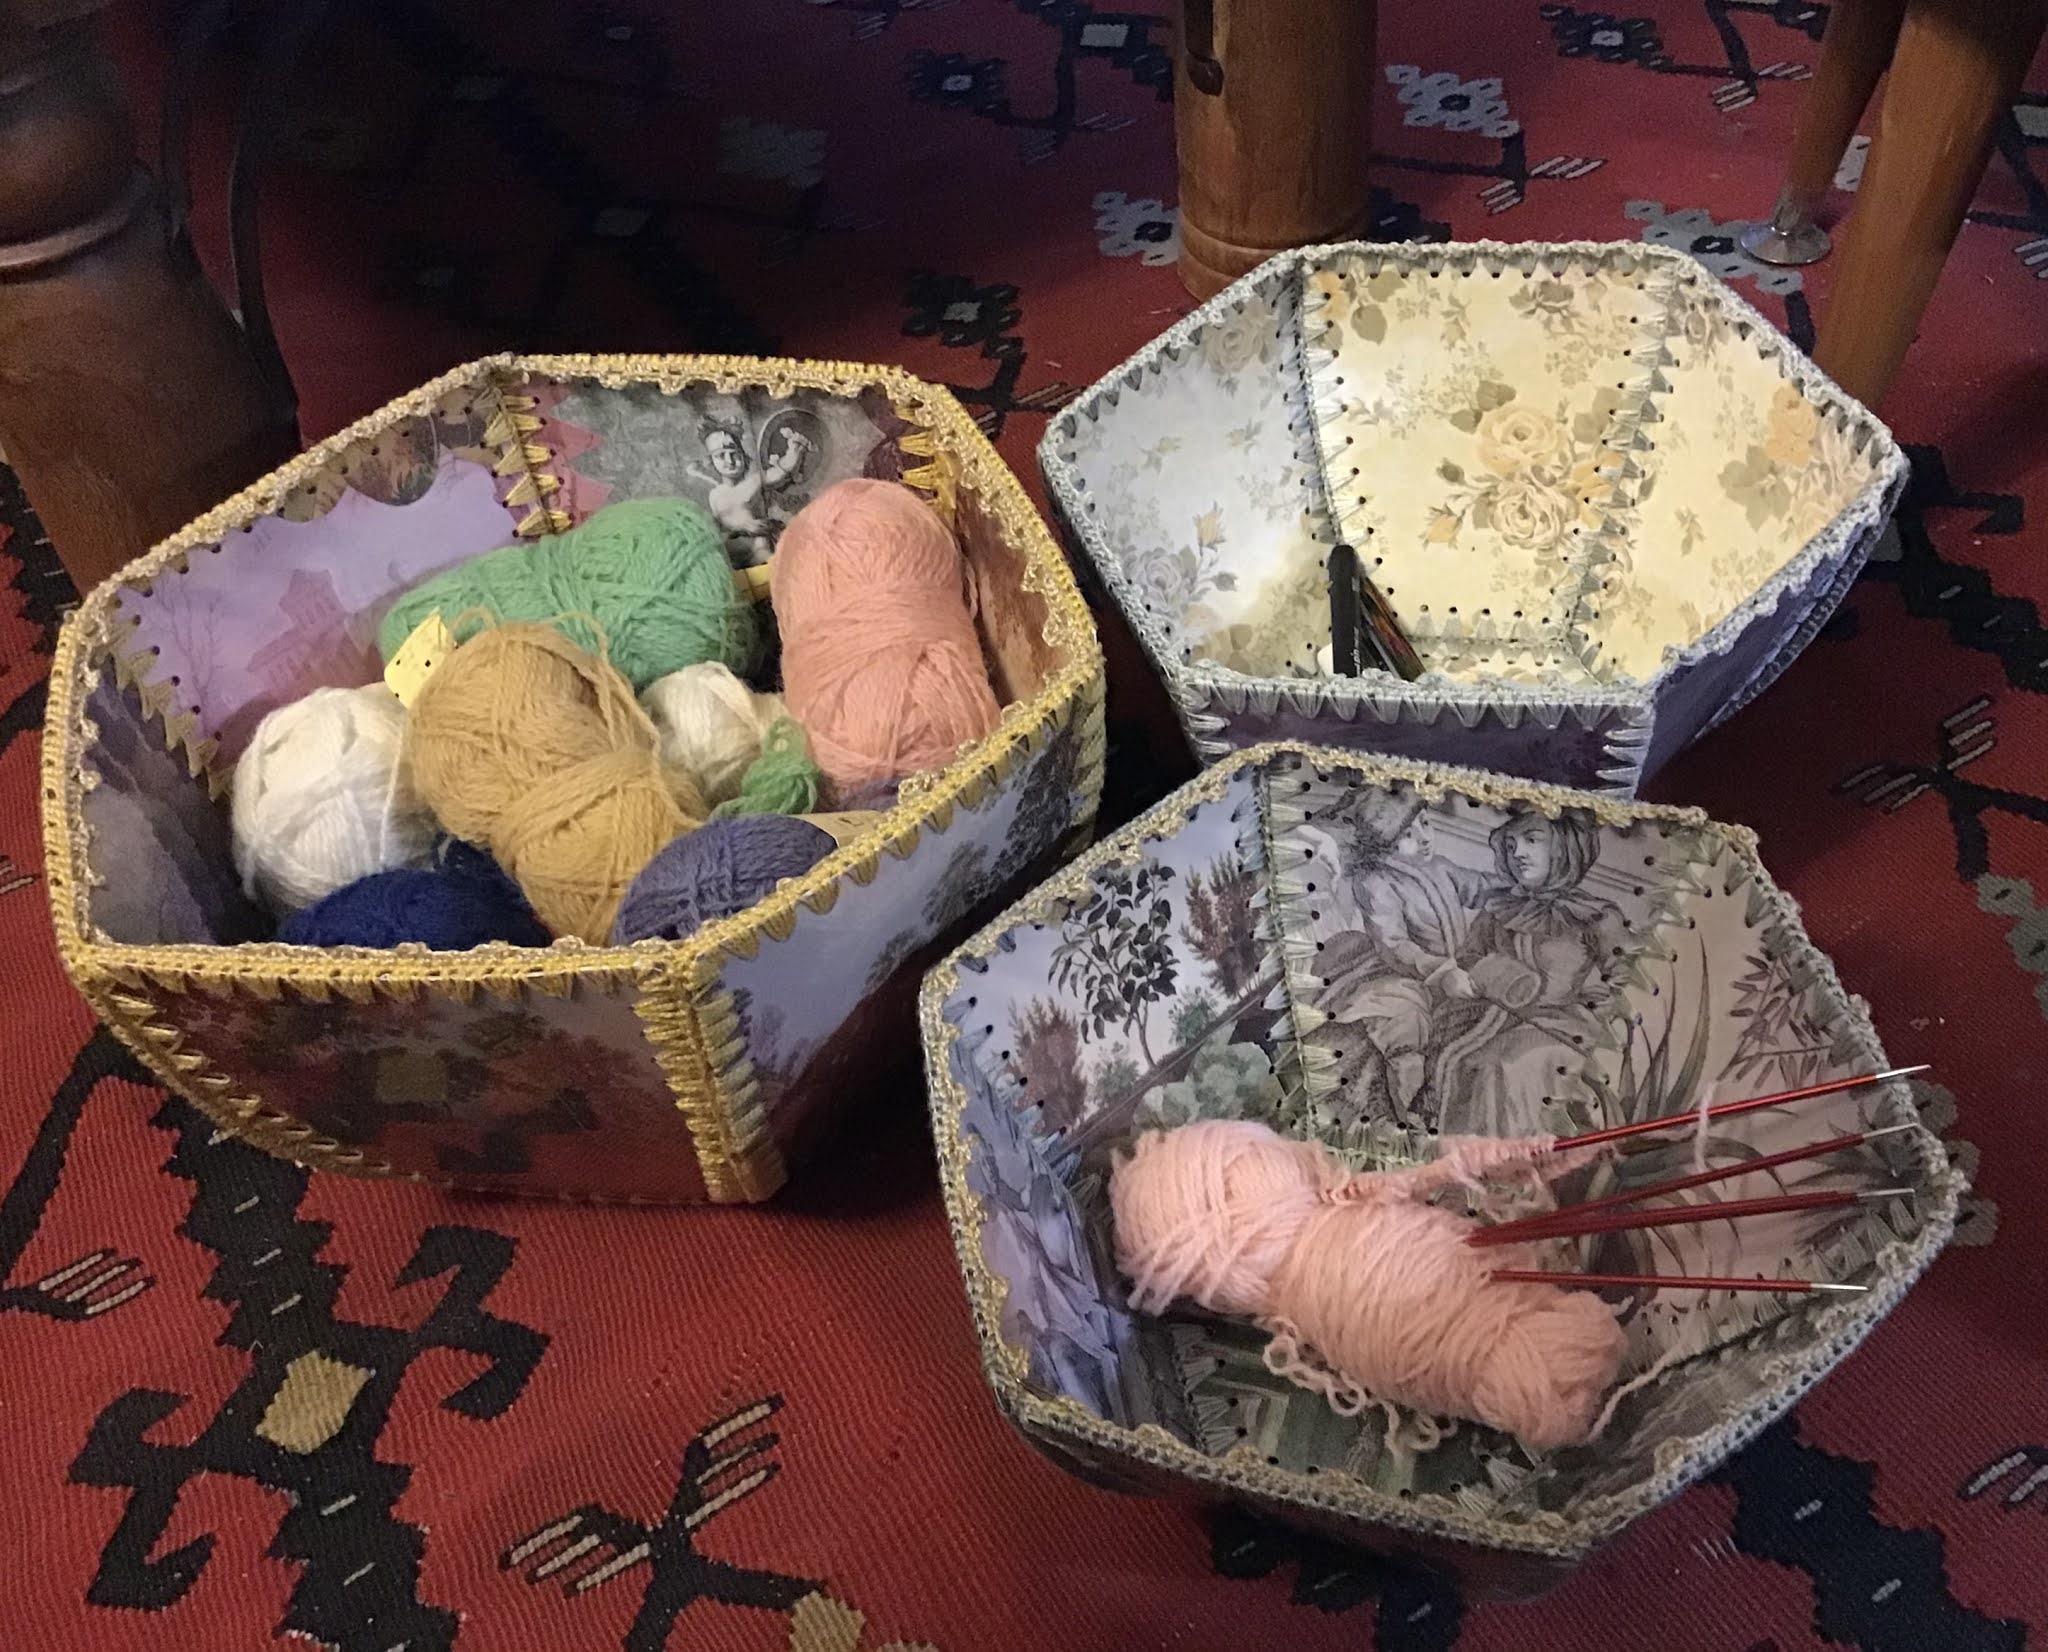
These are very handy. One bowl for the bundle of colours (fair isle cardigan with 9 ish colours) and another for what I’m using, sitting on my lap or table. Stack them together out of the way later. 

I’ve taken to making new boxes and bowl as holiday projects, ignoring my huge list of things I have started, want to do and plan and just cutting loose. Ignoring the fact that I have more boxes than hankies. 


Follow labels below to tutorials, materials lists and patterns.
Or go HERE.


Sunday, January 10, 2021

Berlin Wool Work Picture For The Shed Wall


I so love the Victorian Berlin wool work patterns. This picture was printed out (A3) then glued onto heavy cardboard, which is a bit of a pain to crochet but it’s also not a big job. I forgot to photograph the back but will after it’s stretched and the lace has dried.

My crochet is awfully ad hoc and obviously uneven, but I’m happy. I’m using up my perle and crochet thread stash. 

The picture is for the Bus Stop shed up in the garden. Or the kitchen, not sure.

What I want to do is paint a wash of dilute pva glue over the lace to completely stiffen it... but am not sure how to do it without glueing down the backing. Maybe cling wrap? Maybe that will pull off easily?

Or, I could lace it to four sticks, crossed at the corners. Hmmm... I could lace it to put the glue on... right...

Follow the labels below for tutorials, patterns and materials to make crocheted card (boxes) etc. if you want to. 


Friday, January 01, 2021

Just Did It.

 Following on from the last post...


It’s quite a good size, maybe could be a little lower? I might cut a nest of them to fit inside each other. They’re good have on your lap with the knitting. Better than a bag like when you go somewhere.
Once again, follow the label Crochet or Tutorial to find patterns, instructions and other ideas for your crocheted card experience.


Thursday, December 31, 2020

Relaxing Indulgence Crafts. My New Knitting Bowl.


I found a book of fancy repro etchings, for $6 or something (ages ago) just for this sort of purpose. But you can use anything... photos, book covers, musical scores, art books, kids drawings...


This set of yarn bowls is different than the last one I made, or the last couple. No lid for starters. The lid is annoying on the last one. I never ever use it as intended (for yarn to come through). Ever.
For a tutorial to make these in any shape or form, go HERE and for lots of other crocheted card thingy's I have made and drawn patterns for, go HERE.
If you print out the diagram at A4 it should be right. I don't think a bit different will matter much. Then, slice 3-4mm off the sides and lower edge of the side and off each side of the hexagon. This makes the medium sized bowl. Repeat for the smaller one. I decided the big bowl’s sides we’re quite high so took 10mm off the rim for the medium and a further 4-5mm for the smaller.

Go to the next link for more pictures of the three sizes in a subsequent post:


Sunday, August 30, 2020

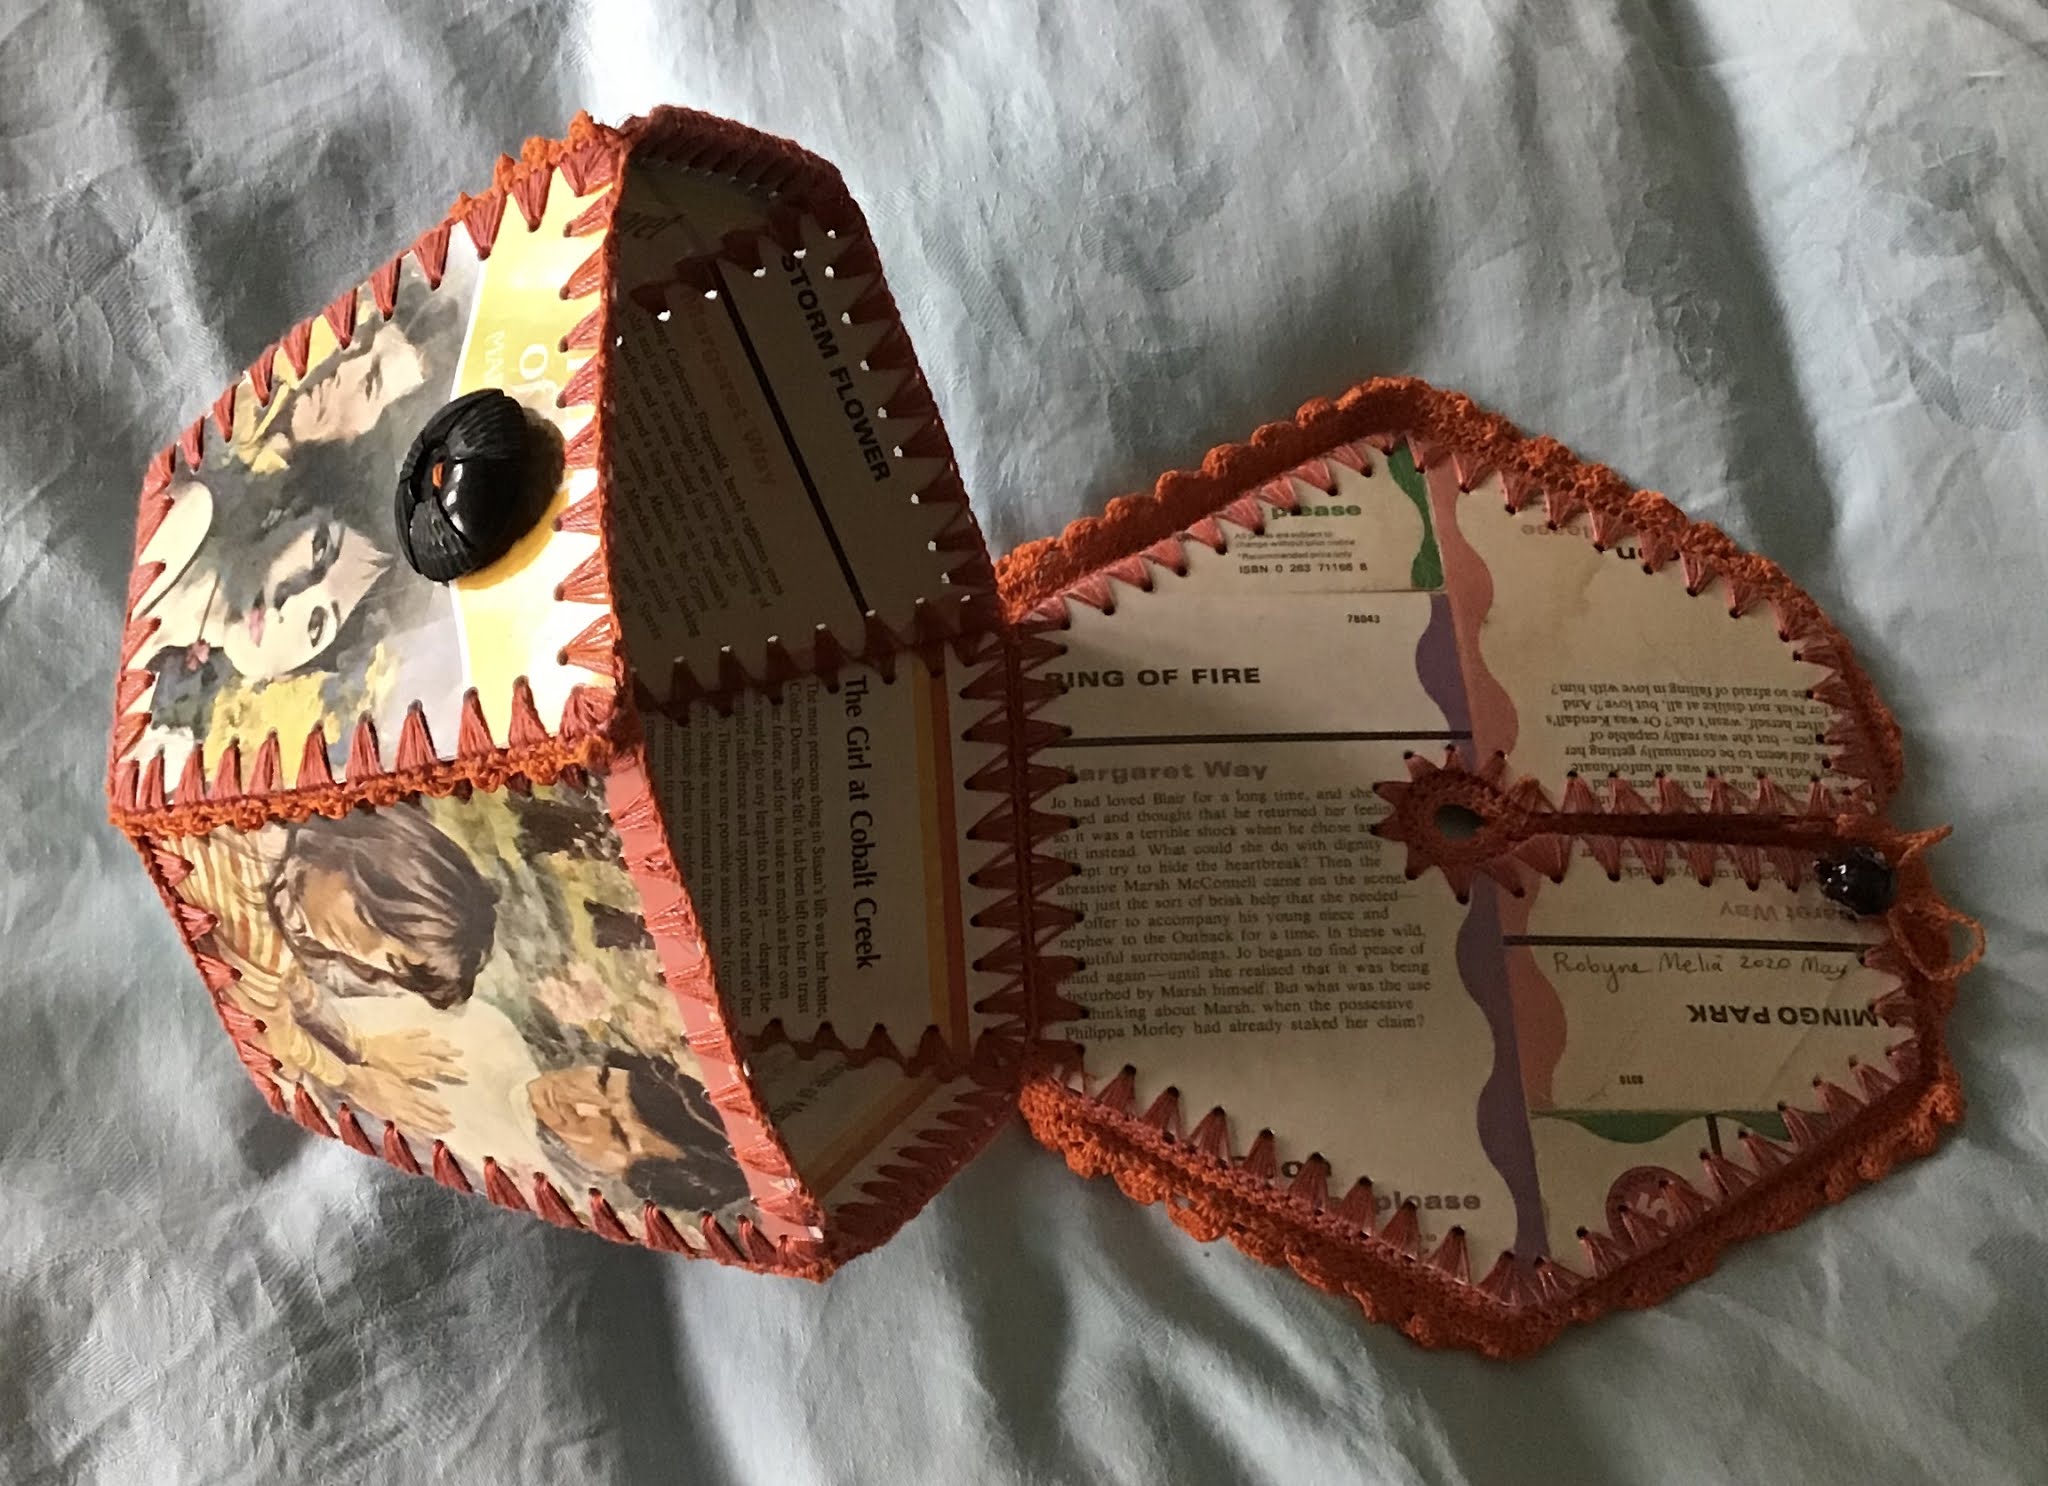
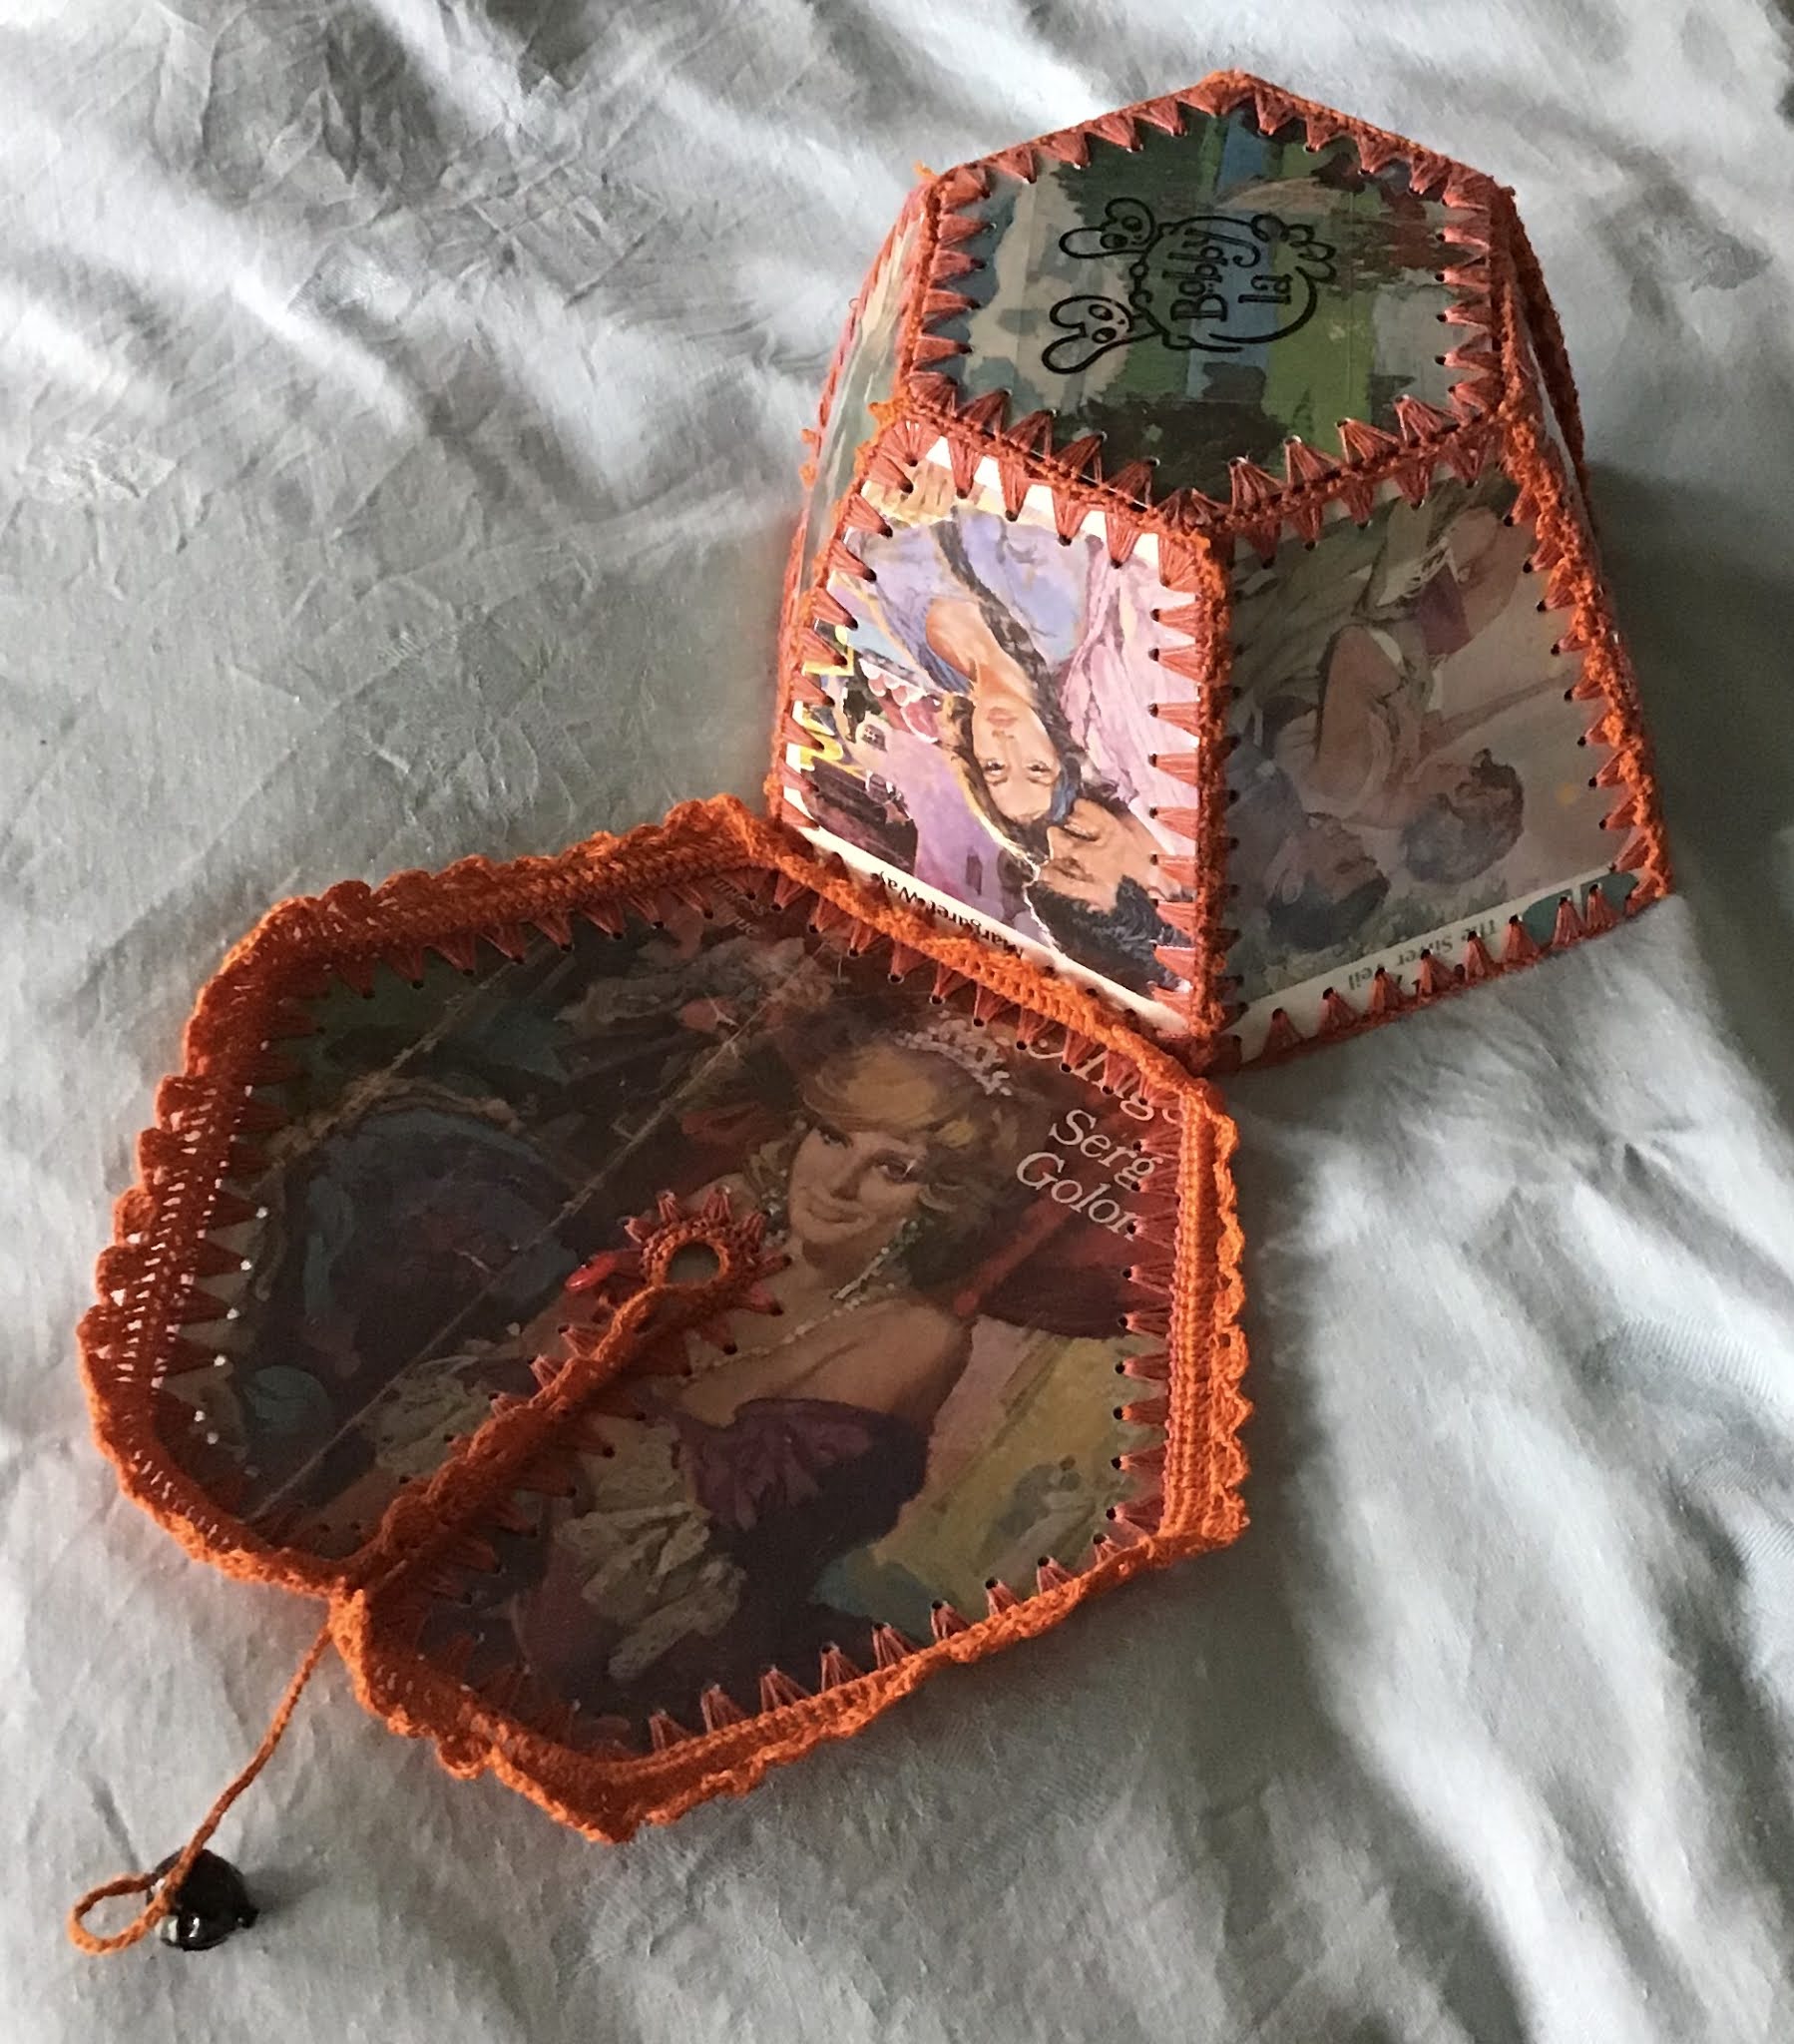
Crocheted Card Yarn Bowl With Lid


 Here is the pattern for my Yarn Bowl. I have made a tutorial which also gives links to where I bought my hole punch and the plastic sheets I use to cover the cards.

With this one, the vintage Mills &Boon romance penny dreadful covers (plus a fantastic 60’s book) make the outside and I’ve used the back covers on the inside. The names of these books are as crazy as the covers, along with the synopses. I’ve used the pages from the stories on the sides or backs too, the naughty bits. But I’m getting too old to even find it ironically funny. Now it’s a bit ew! Not is a prudish way, just in a for goodness sakes, that’s ridiculous way. 

If you follow the tags below (boxes, crochet, tutorials, etc.) you’ll find the tutorial, other patterns and ideas. Here is one directly: http://robynefmelia.blogspot.com/2010/01/box-tutorial-sort-of-thing.html


Friday, August 21, 2020

New Handles On The Crazy Carpet Bag

 At last I fixed the handles! It’s only been an hundred years. I used some from a bag my mum had been making, sentimentally. Mind, she’s in all the sewing I do, she and Grandma.

Look to this post for the details of construction, if you want to make one yourself. I had a class where we did all of the various stitches. These and more. It was heaps of fun and I miss those times with the gals. Maybe after I retire...

I made this to demonstrate a thicker style of stitching to my big crazy quilt, which juxtaposes heavy and very fine work. Contrary to what you might think, it whipped up fairly quickly.

I've carried around these tan velvets since I was 17 or so.

'A fair little girl sat under a tree
Sewing as long as her eyes could see
Then smoothed her work
and folded it right
and said Goodnight dear work
Goodnight, Goodnight.


Wednesday, October 23, 2019